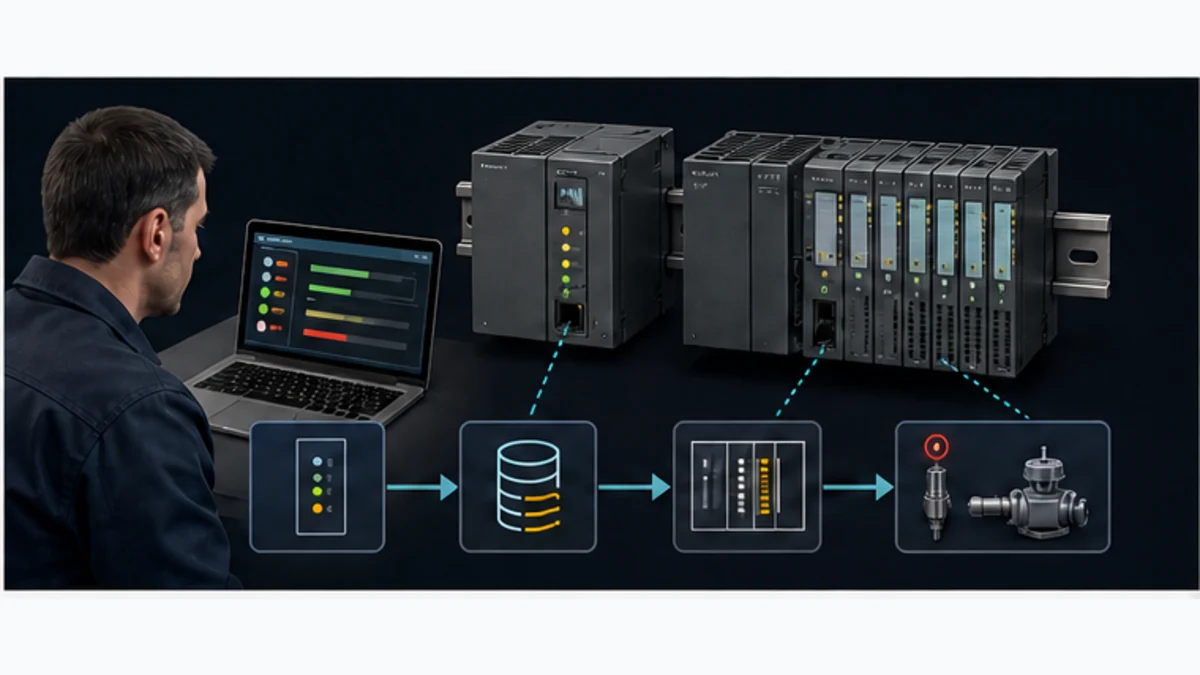
Allen-Bradley PLC Fault Codes: Causes & Fixes
Complete Allen-Bradley PLC fault code reference for CompactLogix, ControlLogix, and MicroLogix. Lookup major and minor fault codes with causes and step-by-step recovery procedures.
When your Allen-Bradley PLC trips a fault, every second of downtime has a cost. This complete reference covers every major fault type, minor fault category, I/O module fault code, LED pattern, and controller status condition you will encounter on CompactLogix, ControlLogix, and MicroLogix platforms — with causes and step-by-step recovery procedures for each.
Whether you are responding to a production stoppage right now or building fault-handler routines in Studio 5000 to prevent the next one, this guide gives you the exact information Rockwell's documentation scatters across dozens of individual manuals.
Quick Answer — Allen-Bradley Fault Hierarchy: Allen-Bradley Logix5000 controllers organize faults into three layers. Major faults halt program execution immediately and require explicit operator clearance before the controller will re-enter Run mode. They are identified by a Type number (1–13) and a Code number within that type. Minor faults are logged but do not stop execution; they are identified by a Type number and Code number in the minor fault log. I/O faults can be either major or minor depending on configuration — specifically the Inhibit and Major Fault on Controller Fault settings in the I/O module properties. All three fault categories are readable through the Controller Properties dialog in Studio 5000 or programmatically via the GSV instruction targeting the CONTROLLER object.
Table of Contents
- Allen-Bradley Fault Hierarchy Explained
- Major Fault Codes — Type 1 Through Type 13
- Minor Fault Codes
- I/O Module Fault Codes
- Controller LED Patterns
- How to Read Fault Information in Studio 5000
- Fault Handler Programming
- EtherNet/IP Communication Error Codes
- Fault Code Quick Reference Table
- Frequently Asked Questions
Allen-Bradley Fault Hierarchy Explained
How Logix5000 Categorizes Faults Differently from Siemens
Engineers familiar with Siemens SIMATIC platforms often expect a linear diagnostic buffer with timestamped error entries — that is not how Allen-Bradley works. Logix5000 controllers implement a structured fault taxonomy based on severity, recoverability, and origin. Understanding this architecture is the foundation for effective troubleshooting.
The Type/Code System
Every Allen-Bradley fault is a pair of numbers: a Type that identifies the category of fault, and a Code that identifies the specific condition within that category. For example, a Type 4, Code 20 fault means a program execution fault (Type 4) caused by an illegal instruction (Code 20). This two-dimensional system lets you narrow down the problem domain before diving into specifics.
Major Faults vs. Minor Faults
| Attribute | Major Fault | Minor Fault |
|---|---|---|
| Effect on execution | Controller enters Faulted mode, program stops | Program continues executing |
| FAULT LED | Solid red | Flashing red |
| Recovery required | Operator must explicitly clear the fault | Auto-cleared or cleared by program |
| Logged in | Major Fault log (up to 6 entries) | Minor Fault log (up to 16 entries) |
| Programmatic access | GSV CONTROLLER MajorFaultRecord | GSV CONTROLLER MinorFaultRecord |
| Typical sources | Watchdog timeout, illegal instruction, I/O loss | Retries, communication warnings, data overflow |
Recoverable vs. Non-Recoverable Major Faults
Not all major faults behave the same way once cleared. Rockwell classifies them as:
- Recoverable: Clearing the fault through the Controller Properties dialog or a CLF instruction returns the controller to Run mode without a download required. Examples: Type 4 program execution faults.
- Non-recoverable: The controller must be power-cycled or the project must be re-downloaded before operation can resume. Examples: certain Type 1 power-up faults involving corrupted firmware or memory integrity failures.
Fault Record Data Structure
Each fault record stored in the controller contains:
- Type (DINT): Fault type category
- Code (DINT): Specific fault code within the type
- Info (DINT): Additional diagnostic information dependent on fault type
- TimeStamp (LINT): Controller clock time when fault occurred
- Program (STRING): Name of the program where the fault occurred
- Routine (STRING): Name of the routine where the fault occurred
- Rung (DINT): Rung number where execution was interrupted
This structure is accessed programmatically using the GSV instruction with the CONTROLLER object, which is covered in detail in the Fault Handler Programming section below.
Major Fault Codes — Type 1 Through Type 13
Type 1: Power-Up and Memory Faults
Type 1 faults occur during power-up self-test or when the controller detects a memory integrity problem. Many Type 1 faults are non-recoverable and require either a power cycle or a firmware update.
| Code | Description | Common Causes | Recovery Steps |
|---|---|---|---|
| 1 | Corrupted memory image | Loss of power during write; defective battery | Clear memory, reload project from backup |
| 2 | Invalid checksum | Firmware corruption; hardware failure | Update firmware via ControlFLASH; replace controller if persistent |
| 3 | Battery low or missing | Battery end of life; battery not installed | Replace battery (1756-BA2 for ControlLogix); clear fault and reload |
| 4 | RAM test failure | Hardware failure | Replace controller backplane module |
| 5 | Flash memory test failure | Firmware update interrupted | Re-flash firmware via ControlFLASH |
| 6 | Non-volatile memory checksum error | Memory corruption due to noise or power loss | Clear memory and reload program |
| 7 | Processor initialization failure | Hardware defect; backplane seating issue | Reseat controller in chassis; replace if fault persists |
| 8 | Project tag database checksum mismatch | Project corruption during download | Re-download project; verify network connection stability during downloads |
| 14 | Duplicate IP address detected at power-up | Another device on the network using the same IP | Change controller IP address; audit network for conflicts |
Recovery Procedure for Type 1 Faults:
- In Studio 5000, go to Controller Properties → Major Faults tab to read the exact Code and Info values.
- Power cycle the controller (remove and reinsert the module for ControlLogix; cycle main power for CompactLogix).
- If the fault recurs on power-up, connect via RSLinx and attempt a ControlFLASH firmware update to the latest revision.
- If the fault persists after firmware update, replace the controller.
Type 3: I/O Connection Faults
Type 3 faults arise from problems with I/O connections at the controller level. A lost EtherNet/IP connection to a remote I/O adapter, a rack with a failed module, or a chassis with a failed backplane will typically generate a Type 3 fault.
| Code | Description | Common Causes | Recovery Steps |
|---|---|---|---|
| 1 | Connection request timed out | I/O module not responding within RPI timeout; cable fault | Check Ethernet cabling; verify module power; verify RPI settings match module capability |
| 2 | Connection failed to open | Module in fault state; incompatible module type | Check module fault LED; verify catalog number matches project configuration |
| 3 | Connection timed out during operation | Intermittent Ethernet connection; excessive network load | Check switch port statistics for errors; reduce network loading; check cable quality |
| 4 | Data format error | Module firmware mismatch; project configuration error | Verify module firmware revision; reconcile I/O configuration in project |
| 16 | Module not responding — ownership conflict | Two controllers requesting connection to same module | Audit Exclusive Owner vs. Listen Only settings in each controller's I/O configuration |
| 17 | Connection inhibited | Module is inhibited in the project I/O tree | Right-click module in I/O tree, select Module Properties → Connection, uncheck Inhibit |
| 18 | Forward open request rejected | Module limit of concurrent connections reached | Reduce number of controller connections to module; upgrade to higher-capacity module |
Note on Type 3 Fault Behavior: By default, a lost connection to a remote I/O module causes a Type 3 Major Fault and stops the controller. You can configure the module to produce a Minor Fault instead by unchecking "Major Fault On Controller If Connection Fails While in Run Mode" in the module's Connection properties. This is appropriate for non-critical monitoring I/O but should never be applied to safety-critical outputs.
Type 4: Program Execution Faults
Type 4 is the most frequently encountered major fault category. These faults occur when Logix5000 encounters a condition during instruction execution that it cannot safely resolve — an array index beyond the tag boundary, a mathematical operation with an undefined result, or an instruction used in an illegal context.
| Code | Description | Common Causes | Recovery Steps |
|---|---|---|---|
| 1 | Illegal array subscript | Computed array index is negative or exceeds the declared array dimension | Add limit checking before array access; check MOD and DIV instructions upstream of the subscript |
| 2 | Invalid indirect tag | Indirect tag reference resolves to a non-existent tag | Verify tag name construction in string concatenation; add tag existence verification |
| 7 | Structure alignment error | Access to a structure member using incorrect alignment | Verify data type definitions; avoid manual memory address calculations |
| 17 | Numeric overflow | Result exceeds the range of the destination data type (DINT overflow, etc.) | Add range checking; use LINT for large accumulated values |
| 18 | Division by zero | DIV, MOD, or computed array index results in a divide-by-zero | Add a zero-check branch before any division; never use a raw analog input as a divisor without scaling validation |
| 19 | Data log buffer full | The data log fill rate exceeds the emptying rate | Increase buffer size; reduce logging rate; verify log consumer is running |
| 20 | Invalid instruction | Instruction encountered in wrong context or with invalid parameters | Check instruction documentation for context restrictions; verify instruction operands |
| 21 | Subroutine nesting too deep | JSR call depth exceeds the controller limit (typically 32 levels) | Flatten program hierarchy; replace deeply nested JSR chains with direct code |
| 30 | JMP to undefined label | JSR or JMP targets a label or routine that does not exist | Verify all JMP LBL pairs; verify JSR target routine names |
| 31 | FOR/NEXT loop exceeded step count | Computed loop iteration count exceeds controller limit | Add an explicit limit check before the FOR instruction; verify step size is non-zero |
| 36 | Structured text syntax error (runtime) | A Structured Text expression evaluates to an illegal form at runtime | Add input validation before ST expressions; test with boundary values |
| 42 | Watchdog timeout | The program task did not complete within the configured watchdog period | Increase task watchdog period; optimize code in continuous task; move processing to periodic tasks |
| 51 | Motion instruction error | Motion instruction attempted in invalid state | Clear motion faults first; verify drive is enabled before issuing motion commands |
| 54 | Invalid parameter value | An instruction parameter is outside the valid range | Check instruction documentation for valid parameter ranges; add validation logic |
| 56 | Online edit rejected | Online edit could not be applied due to program state | Finalize edit; verify no pending edits exist in other routines |
| 78 | Output tag not produced | Produced tag has no consumers configured when program attempts to publish | Add at least one consume connection or remove the produced tag configuration |
Type 4, Code 42 — Watchdog Fault Detail:
The watchdog fault is the most misdiagnosed major fault. The Logix5000 watchdog is a per-task timer, not a global system watchdog. Each continuous, periodic, or event task has its own configurable watchdog period (default 500 ms for continuous tasks). If the task does not complete one full scan within the watchdog period, a Type 4, Code 42 fault is generated.
Common root causes:
- Excessive computation in a continuous task that should be in a periodic task
- A nested FOR loop with a large iteration count in the scan path
- An infinite wait in a WAIT instruction
- A new motion profile added to the scan path without increasing the watchdog period
Type 4, Code 1 — Array Subscript Fault Detail:
The array subscript fault is common in applications that use computed indices. Logix5000 does not automatically clamp array indices — if your code computes MyArray[RecipeIndex] and RecipeIndex holds a value of 50 but MyArray is declared with 50 elements (indices 0–49), a Type 4 Code 1 fault immediately halts the controller.
Best practice: always use a LIM instruction to validate the index before use, or declare arrays with one extra element as a safety margin.
Type 6: Instruction-Level Faults
Type 6 faults are generated by specific instructions that detect an error internal to their own execution. Unlike Type 4 faults which are detected by the controller kernel, Type 6 faults are raised by the instruction itself.
| Code | Description | Common Causes | Recovery Steps |
|---|---|---|---|
| 1 | FIFO/LIFO stack overflow | Push to a full stack | Check stack length before push; add empty/full bit checking logic |
| 2 | FIFO/LIFO stack underflow | Pop from an empty stack | Check empty bit before pop operation |
| 3 | SFC fault — step timed out | An SFC step exceeded its configured timeout | Increase step timeout; debug why step transition condition never became true |
| 4 | SFC concurrent branch fault | Concurrent branches have incompatible synchronization points | Review SFC branch convergence logic |
| 7 | ENCDG instruction parameter error | Invalid parameter to an encoding or decoding instruction | Verify source/destination data types and parameter ranges |
| 8 | STRING instruction overflow | Result string exceeds 82-character STRING type limit | Use CONCAT carefully; truncate long strings; consider custom UDT for longer strings |
| 12 | Motion coordinate transform singularity | Kinematic singularity encountered during coordinated motion | Modify path to avoid singularity; add singularity detection in motion path planning |
Type 7: Watchdog Faults (System Level)
Type 7 watchdog faults are distinct from the Type 4, Code 42 task watchdog. Type 7 faults indicate a system-level watchdog condition where the controller's background system tasks were unable to complete within the required period — a symptom of a severely overloaded controller or a hardware issue.
| Code | Description | Common Causes | Recovery Steps |
|---|---|---|---|
| 1 | System watchdog expired | Controller CPU utilization consistently at 100%; hardware failure | Measure task CPU overhead; move tasks to lower priority; check for infinite loops |
| 2 | Background task watchdog expired | Diagnostic and communication background tasks starved | Reduce continuous task scan load; increase task periods for non-critical tasks |
Type 8: Data Mode Transition Faults
Type 8 faults occur during transitions between operating modes, most commonly when switching from Program mode to Run mode with invalid program state.
| Code | Description | Common Causes | Recovery Steps |
|---|---|---|---|
| 1 | Invalid mode transition | Attempting Run while major fault is present | Clear major fault first; then transition to Run mode |
| 2 | Force table entries exist — transition blocked | Safety interlock in project prevents Run with active forces | Remove output forces; audit all force entries before running |
| 3 | Program checksum mismatch on mode change | Corrupted program detected during mode transition | Re-download project; verify controller memory integrity |
| 4 | Safety task not ready | Integrated Safety controller safety task not in valid state | Check Safety task configuration; verify safety I/O connections |
Type 11: Motion Faults
Type 11 faults are generated by the motion subsystem and indicate conditions specific to servo axes, virtual axes, and coordinated motion groups. These faults require motion-specific recovery procedures in addition to standard fault clearing.
| Code | Description | Common Causes | Recovery Steps |
|---|---|---|---|
| 1 | Axis hardware fault | Drive faulted; encoder signal loss; drive over-temperature | Check drive fault LED and drive fault code on HMI; clear drive fault first |
| 2 | Position error limit exceeded | Following error exceeds configured limit; load inertia mismatch | Increase position error limit; re-tune servo gains; verify mechanical coupling |
| 3 | Velocity limit exceeded | Commanded velocity exceeds drive or application limit | Reduce commanded velocity; verify velocity feedforward is not over-scaling |
| 4 | Software travel limit hit | Move would exceed configured software end-of-travel limit | Issue MASD (axis stop); re-home axis; verify home position |
| 5 | Motor feedback fault | Encoder failure; cable damage; excessive electrical noise | Check encoder cable and connector; add shielding; measure encoder supply voltage |
| 6 | Commutation fault | Absolute encoder battery low; encoder multi-turn data invalid | Replace encoder battery; perform encoder homing procedure |
| 7 | Integrated motion on EtherNet/IP fault | iCIP (integrated CIP Motion) connection to drive lost | Verify Ethernet connection to drive; check for drive IP conflict |
| 10 | Motion group sync fault | Multiple axes in group lost synchronization | Check system-level Ethernet topology; verify time synchronization (CIP Sync/PTP) |
| 14 | Drive inhibited | Drive enable signal not present when motion commanded | Verify hardwired drive enable signal; verify safety relay is closed |
| 22 | Acceleration limit exceeded | Commanded acceleration rate exceeds drive capability | Reduce acceleration ramp; verify jerk limiting is configured |
Motion Fault Recovery Sequence:
- Issue MASD (Motion Axis Stop Disable) to disable the axis.
- Clear the motion fault on the drive HMI (if drive-level fault exists).
- Issue MAFR (Motion Axis Fault Reset) in the ladder program.
- Wait for .ACCFault bit to clear.
- Re-enable the drive with MASD or MAAT depending on axis type.
- Issue new motion command (MAJ, MAM, etc.) only after axis status shows Ready.
Type 13: I/O Connection and Device Faults
Type 13 faults are similar to Type 3 but arise from connection-level errors detected by the I/O communication layer rather than at the controller kernel level.
| Code | Description | Common Causes | Recovery Steps |
|---|---|---|---|
| 1 | Module-defined fault | I/O module reported a self-defined fault condition | Check module fault LED and specific module documentation for sub-code |
| 2 | Connection not established | Module did not respond to connection request | Verify module power; verify RPI period; check for IP conflicts on EtherNet/IP networks |
| 3 | Connection timed out | Established connection went silent | Check network infrastructure; verify switch port settings (auto-negotiation vs. fixed speed) |
| 5 | Module key mismatch | Physical module catalog number or series does not match project configuration | Update module properties in project to match installed hardware; or replace module |
| 16 | Safety I/O connection fault | Safety module connection lost or reported a safety fault | Follow safety-rated recovery procedure; verify safety connection certificates |
Live mini-lab
Try it: press START, then STOP
A stop-dominant seal-in rung: START latches the motor output through its own contact, and STOP breaks the circuit.
Watch the output lamp: it stays on after START until you press STOP.
Free to start · runs in your browserOpens plcsimulationsoftware.com — same team
Minor Fault Codes
Minor faults are logged in the controller's Minor Fault log (up to 16 entries) but do not halt program execution. They signal conditions that warrant attention but are not immediately dangerous to machine or process operation. The FAULT LED flashes red (rather than solid red) when only minor faults are present.
Common Minor Fault Types and Codes
| Type | Code | Description | Common Causes | Recovery |
|---|---|---|---|---|
| 1 | 1 | Battery low | Battery nearing end of life | Replace battery; fault auto-clears on replacement |
| 1 | 2 | Battery missing | Battery not installed | Install correct battery type |
| 3 | 1 | Connection request retry | Module did not respond within RPI — retrying | Transient network issue; monitor for escalation to major fault |
| 3 | 8 | I/O forced | Outputs or inputs are currently forced | Audit and remove forces before returning to production |
| 4 | 7 | Numeric overflow | Arithmetic overflow that does not halt controller (specific instruction) | Review data types; scale values to prevent overflow |
| 4 | 14 | Divide by zero (minor) | Specific instructions configured for minor fault on divide-by-zero | Add upstream zero check; review instruction error handling configuration |
| 6 | 1 | Data highway connection limit | Data Highway Plus connection count nearing maximum | Audit DH+ connections; consider Ethernet migration |
| 7 | 4 | Time-of-day clock not set | Controller clock was not set after battery replacement | Set controller date/time in Controller Properties |
| 8 | 1 | Execution overlap | A periodic task did not complete before its next scheduled start | Increase task period; optimize scan time |
| 8 | 2 | Output tag not consumed | Produced tag has no current consumers | Verify consumer controllers are online and connected |
| 10 | 1 | Motion axis warning | Axis warning condition (not fault) — following error approaching limit | Monitor and tune; increase limit if appropriate |
| 14 | 1 | Firmware mismatch — non-critical | Minor module firmware revision mismatch | Update module firmware for best compatibility |
Execution Overlap (Type 8, Code 1) — Important Detail
An execution overlap minor fault is one of the most operationally significant minor faults because it indicates that the control timing is degrading. When a periodic task with a 10 ms period takes 12 ms to execute, the next scheduled execution of that task is skipped. The controller logs a Type 8, Code 1 minor fault for each skipped execution.
If execution overlap becomes frequent, it will eventually escalate to a watchdog fault. Address execution overlap by:
- Moving non-time-critical code from the overloaded periodic task to a lower-priority task.
- Converting large lookup tables to computed values.
- Splitting a single large periodic task into multiple tasks with different periods.
- Upgrading to a higher-performance controller if the application genuinely requires the computation.
I/O Module Fault Codes
Digital I/O Module Faults
Allen-Bradley digital I/O modules (1756, 1769, 5069 series) report their status through the module's fault bits, which appear as tags in the I/O tree once the module is configured in the project.
| Fault Indicator | Tag Bit | Meaning | Recovery |
|---|---|---|---|
| Module Fault | Local:x:I.Fault | Module has declared a general fault | Check module LED; power cycle; check backplane seating |
| Connection Fault | Local:x:I.Conn | Module has lost its connection to the controller | Verify power and backplane; check for I/O tree inhibit |
| Running Fault | Local:x:I.Run | Module is not running (in fault or program state) | Clear controller major fault; verify controller is in Run mode |
| Field Power Lost | Local:x:I.FieldPwrLost | 24VDC field power not present on output module | Check field power fuse and supply; verify wiring to field power terminals |
| Output Short Circuit | Local:x:I.ShortCircuit[y] | Output point y has detected a short circuit | Remove load; locate short in wiring; replace load device if damaged |
| Output Diagnostic Fault | Local:x:I.DiagFault[y] | Output with diagnostic reporting detected a fault at point y | Check load wiring and load device for the specific point |
| Fuse Blown (electronic) | Local:x:I.FuseBlown[y] | Electronic fuse tripped on point y | Remove overload; reset electronic fuse by sending Reset command bit |
Resetting an Electronic Fuse:
Digital output modules with electronic fuse protection (such as 1756-OB16EI) require an explicit reset. In ladder logic, pulse the tag Local:x:O.ResetFuse[y] for one scan after removing the overload. The module will only reset if the fault condition (short circuit or overload) is no longer present.
Analog I/O Module Faults
Analog modules add additional fault categories related to signal range, calibration, and channel-level diagnostics.
| Fault Type | Tag / Indicator | Meaning | Recovery |
|---|---|---|---|
| Calibration fault | Local:x:I.CalFault[y] | Module self-calibration failed for channel y | Run module calibration via RSLogix/Studio 5000; replace module if repeated |
| Over-range | Local:x:I.ChOverrange[y] | Input signal exceeds the configured maximum (e.g., > 20 mA on 4-20 mA input) | Check field transmitter; verify wiring polarity; verify configured engineering units |
| Under-range | Local:x:I.ChUnderrange[y] | Input signal below configured minimum (e.g., < 4 mA on 4-20 mA, indicating a broken wire) | Check transmitter power; verify 4-20 mA loop wiring; check for broken wire |
| Open wire | Local:x:I.OpenWire[y] | Specifically detected open wire condition on channel y | Check terminal connection; check cable continuity |
| Data overflow | Local:x:I.ChDataOverflow[y] | Scaled engineering value overflowed the destination tag data type | Widen destination tag (use REAL instead of INT); adjust scaling |
| Module temperature warning | Local:x:I.TempWarning | Module internal temperature approaching limit | Improve panel ventilation; check ambient temperature |
| Module temperature fault | Local:x:I.TempFault | Module internal temperature exceeded limit | Remove module; allow to cool; investigate panel thermal management |
4-20 mA Broken Wire Detection:
A signal reading below 4 mA on a 4-20 mA input channel is a classic indication of a broken wire in the loop. Most Allen-Bradley analog input modules generate an Under-range fault automatically when this condition is detected, provided the "Detect Open Wire" or "Enable Fault" option is enabled in the module's channel configuration. This should always be enabled for process signals where loss of signal could cause an unsafe condition.
Communication Module Faults
EtherNet/IP Communication Modules (1756-EN2T, 1756-EN3TR, etc.)
| Fault LED State | Meaning | Common Causes | Recovery |
|---|---|---|---|
| Solid red | Module fault — hardware or firmware | Hardware failure; firmware update required | Power cycle; re-flash firmware; replace if persistent |
| Flashing red | Communication fault — connection lost | Network disconnection; duplicate IP; switch failure | Check cable; verify IP uniqueness; check switch port |
| Alternating red/green | IP address conflict detected | Another device is using the same IP address | Audit and resolve IP conflict; use static IPs in industrial networks |
| Solid green | Normal operation | — | No action required |
| Flashing green | Establishing connections | Normal during startup | Wait for steady green; investigate if extended |
DeviceNet Scanner Module Faults (1756-DNB)
| Fault Code | Description | Recovery |
|---|---|---|
| 77 | Scanner configuration mismatch | Device connected is different from expected; update scanner configuration |
| 91 | Network power supply fault | 24V DeviceNet network power not present; check network power supply |
| 94 | Communication failure with a slave | Slave device not responding; check device power and drop cable |
| 95 | Slave device faulted | Slave reported a fault; check slave device diagnostics |
Controller LED Patterns
Understanding LED patterns lets you diagnose controller state without a laptop. Both CompactLogix and ControlLogix controllers use the same general LED pattern language, though the physical layout of the LEDs varies.
CompactLogix (5370 and 5380 Series) LED Patterns
| LED | State | Meaning |
|---|---|---|
| RUN | Solid green | Controller in Run mode, executing program normally |
| RUN | Flashing green | Controller in Remote Run mode |
| RUN | Solid yellow | Controller in Program mode |
| RUN | Flashing yellow | Controller in Remote Program mode or Test mode |
| RUN | Off | Controller not powered; severe hardware fault |
| FAULT | Off | No fault present |
| FAULT | Flashing red | Minor fault present — program still executing |
| FAULT | Solid red | Major fault present — program execution halted |
| OK | Solid green | Controller operating normally |
| OK | Flashing red | Controller failure — replace controller |
| OK | Flashing green | Controller is updating firmware (do not remove power) |
| I/O | Solid green | All I/O connections established and healthy |
| I/O | Flashing green | At least one I/O module is in the process of establishing connection |
| I/O | Flashing red | I/O connection fault — at least one module has faulted or connection lost |
| ETH | Solid green | Ethernet link active, connected at 100/1000 Mbps |
| ETH | Flashing green | Ethernet link active with traffic |
| ETH | Off | No Ethernet link — check cable |
| ETH | Solid red | Ethernet fault — duplicate IP or hardware failure |
ControlLogix (L7x/L8x Series) LED Patterns
| LED | State | Meaning |
|---|---|---|
| RUN | Solid green | Run mode, normal execution |
| RUN | Flashing green | Remote Run mode |
| RUN | Solid yellow | Program mode |
| FAULT | Solid red | Major fault — program stopped |
| FAULT | Flashing red | Minor fault — program running |
| FAULT | Off | No fault |
| OK | Solid green | Normal operation |
| OK | Flashing green | Firmware update in progress |
| OK | Flashing red (4 Hz) | Recoverable major fault |
| OK | Flashing red (1 Hz) | Non-recoverable fault — controller must be replaced or reflashed |
| BAT | Off | Battery OK (this LED is only lit when battery attention is needed) |
| BAT | Solid yellow | Battery low — replace within 30 days |
| BAT | Flashing yellow | Battery missing |
Power Supply LED Patterns (1756-PAxxx)
| LED | State | Meaning |
|---|---|---|
| DC OK | Solid green | All DC bus voltages within specification |
| DC OK | Off | Power supply failure or no input power |
| AC IN | Solid green | AC input voltage within range |
| AC IN | Flashing | AC input voltage out of range or faulted |
How to Read Fault Information in Studio 5000
Method 1: Controller Properties Dialog
This is the primary manual method for reading fault information during troubleshooting.
Step-by-step procedure:
- Connect to the controller in Studio 5000 using RSLinx as the communications driver.
- Right-click the controller name in the Controller Organizer (left panel) and select Properties.
- Click the Major Faults tab.
- The dialog displays the current major fault (if any) showing: Type, Code, Info, Time, Program, Routine, and Rung number.
- Click the Minor Faults tab to review the minor fault log — up to 16 entries with timestamps.
- Use the Fault History tab to review the fault log entries in chronological order.
- Click Clear Major Faults (or use the Clear Faults button on the toolbar) to clear the current major fault.
Important: Clearing a major fault does not prevent recurrence. Always investigate and correct the root cause before returning the controller to Run mode.
Method 2: Reading the Fault Log from the Keyswitch
When a laptop is not available and the controller has a keyswitch + OK button, you can cycle through fault information on the 7-segment display (present on some older CompactLogix models):
- Momentarily press the OK button to activate the 7-segment display.
- The display shows the fault type as two hexadecimal digits.
- Press OK again to advance to the fault code.
- Press OK again to return to normal display (showing the controller status abbreviation).
Method 3: GSV Instruction to Read Fault Data Programmatically
The Get System Value (GSV) instruction provides programmatic access to all controller fault information. This is essential for building SCADA/HMI displays that show meaningful fault information to operators.
Reading the current major fault record:
GSV
  Class Name:    CONTROLLER
  Instance Name: (leave blank)
  Attribute Name: MajorFaultRecord
  Dest:          FaultRecord          (UDT: AB_CONTROLLER_FAULT_RECORD or DINT[6])
Fault Record Tag Structure (DINT[6] mapping):
| DINT Index | Content |
|---|---|
| [0] | Fault Type |
| [1] | Fault Code |
| [2] | Fault Info (extended diagnostic) |
| [3] | Time stamp — lower 32 bits |
| [4] | Time stamp — upper 32 bits |
| [5] | Program index (identifies which program faulted) |
Reading the fault program name:
GSV
  Class Name:    PROGRAM
  Instance Name: (use the program index from FaultRecord[5])
  Attribute Name: Name
  Dest:          FaultProgramName     (STRING tag)
Reading the minor fault log:
GSV
  Class Name:    CONTROLLER
  Instance Name: (leave blank)
  Attribute Name: MinorFaultRecord
  Dest:          MinorFaultLog        (DINT[16] — stores the first minor fault; use an array for multiple)
Interpreting the Fault Info (DINT[2]) Field
The Info field provides supplemental diagnostic information. Its interpretation depends on the fault type:
| Fault Type | Info Field Meaning |
|---|---|
| Type 3 | Connection serial number of the failed I/O connection |
| Type 4 | For Code 1 (array subscript): contains the invalid subscript value that caused the fault |
| Type 4 | For Code 18 (division by zero): contains the divisor value (should be 0) |
| Type 11 | Motion axis ID that generated the fault |
| Type 13 | Module slot number or CIP connection serial number |
Fault Handler Programming
A well-designed fault handler is the difference between a five-second recovery from a nuisance fault and a 30-minute production stoppage requiring maintenance involvement for a fault that the controller could have handled automatically.
Creating the Major Fault Handler Routine
The Logix5000 controller supports one designated Controller Fault Handler routine. This routine executes automatically whenever a major fault occurs — before the controller transitions to Fault mode. If the fault handler completes without clearing the fault, the controller enters Fault mode as normal. If the handler clears the fault (or determines the fault is acceptable), the controller can continue running.
Setup procedure in Studio 5000:
- In the Controller Organizer, expand Controller → Tasks → Controller Fault Handler.
- If not present, right-click the Controller Fault Handler folder and select New Routine.
- Name the routine (convention:
Ctrl_FaultHandlerorMain_FaultHandler). - Right-click the Controller icon → Properties → Advanced tab → set the Fault Routine to your new routine.
Reading the Fault in the Handler
The fault handler has access to the fault record through a predefined tag. Use GSV to read it at the start of the handler routine:
Structured Text example:
// Read the current major fault record
GSV(CONTROLLER,,MajorFaultRecord,FaultRecord);

// Extract type and code
FaultType := FaultRecord[0];
FaultCode := FaultRecord[1];
FaultInfo := FaultRecord[2];
Ladder Logic example (GSV rung):
|                  GSV                      |
| Class: CONTROLLER  Attr: MajorFaultRecord |
| Dest: FaultRecord[0]                      |
Selective Fault Clearing with CLF Instruction
The CLF (Clear Faults) instruction clears the current major fault if called within the fault handler. Use conditional logic to only clear faults that are safe to auto-recover from.
Ladder Logic — selective fault clearing:
| [FaultType EQU 4] [FaultCode EQU 42]              CLF  |
|  Watchdog timeout — safe to auto-clear              CLF  |
|  after logging                                           |
Best practice: Never auto-clear Type 1 faults (memory/hardware faults) or Type 11 motion faults without additional safety verification. These categories indicate conditions where automatic recovery could be unsafe.
Fault Logging to Non-Volatile Memory
Use the fault handler to write fault records to a tag array stored in the controller's non-volatile memory (NVS) for persistent fault history that survives power cycles:
// In Structured Text fault handler:
// Shift log array and insert new entry
FOR i := FaultLog_Size - 1 TO 1 BY -1 DO
    FaultLog[i] := FaultLog[i-1];
END_FOR;

FaultLog[0].Type    := FaultType;
FaultLog[0].Code    := FaultCode;
FaultLog[0].Info    := FaultInfo;
FaultLog[0].TimeLow := FaultRecord[3];
Run Structured Text in the simulator
Common Fault Handler Patterns
Pattern 1 — Log and Alert (no auto-clear): All major faults are logged to an array and an HMI alert bit is set. Operator must acknowledge and clear. Appropriate for safety-critical machinery.
Pattern 2 — Auto-clear nuisance faults: Type 4, Code 42 watchdog faults caused by a known transient condition (e.g., recipe loading) are automatically cleared if they have not recurred more than 3 times in a defined time window. The fault handler increments a counter and checks the window.
Pattern 3 — Motion fault auto-recovery: For Type 11 motion faults with non-critical axes (conveyors, not presses), the handler issues MAFR and sets a bit that triggers the machine's auto-restart sequence. The sequence re-homes the axis and resumes the production cycle if safe.
Pattern 4 — I/O fault differentiation: The fault handler reads the I/O tree status tags to identify which specific module caused a Type 3 fault, sets an HMI indication pointing to the exact module slot, and (for non-critical monitoring I/O) auto-clears the fault.
EtherNet/IP Communication Error Codes
EtherNet/IP uses the CIP (Common Industrial Protocol) error model. When a CIP service request fails, the response includes a General Status code and an Extended Status code. You will encounter these codes in:
- Studio 5000 fault messages for I/O connections
- RSLinx diagnostic views
- MSG instruction ErrorCode and ExtendedErrorCode tags
- EtherNet/IP switch diagnostic tools
CIP General Status Codes
| Status Code (hex) | Name | Description | Recovery |
|---|---|---|---|
| 0x00 | Success | Request succeeded | No action |
| 0x01 | Connection Failure | General connection failure | Check cable; check IP; check switch |
| 0x02 | Resource Unavailable | Target device has insufficient resources | Reduce connection count; check device limits |
| 0x03 | Invalid Parameter Value | A parameter in the request is out of range | Verify request configuration |
| 0x04 | Path Segment Error | Invalid path segment in the request | Verify device path in MSG instruction |
| 0x05 | Path Destination Unknown | Path references a non-existent object | Verify device configuration |
| 0x06 | Partial Transfer | Only partial data was transferred | Check packet size vs. buffer size |
| 0x07 | Connection Lost | Existing connection dropped | Check network; reconnect |
| 0x08 | Service Not Supported | Target device does not support the requested service | Verify device capabilities |
| 0x0A | Attribute Not Settable | Attribute is read-only | Do not attempt to write this attribute |
| 0x0C | Object State Conflict | Request conflicts with current object state | Put device in correct state before request |
| 0x0D | Object Already Exists | Creating an object that already exists | Delete existing object or use existing |
| 0x0E | Attribute Not Settable | Target attribute is not writable | Use correct attribute or service |
| 0x10 | Device State Conflict | Device mode conflicts with request | Change device mode (e.g., idle vs. run) |
| 0x11 | Reply Data Too Large | Response data exceeds allocated buffer | Increase MSG instruction buffer; split request |
| 0x13 | Not Enough Data | Request packet too small | Verify request data size |
| 0x14 | Attribute Not Supported | Requested attribute not defined in this device | Verify device documentation |
| 0x15 | Too Much Data | Request packet too large | Reduce data size per request |
| 0x19 | Store Operation Failure | NVS write failure in target device | Retry; check device health |
| 0x1C | Missing Attribute List Entry | Required attribute not present in list request | Add missing attribute to request |
| 0x20 | Invalid Parameter | General invalid parameter | Verify all request parameters |
| 0x25 | Path Size Invalid | Path segment count is wrong | Correct path in MSG configuration |
| 0x26 | Unexpected Attribute | Attribute in response not requested | Investigate device behavior |
| 0xFF | General Error | Non-specific error — use extended status | Check extended status code |
CIP Extended Status Codes (Connection Failure — Status 0x01)
| Extended Code (hex) | Description | Recovery |
|---|---|---|
| 0x0100 | Connection in use | Target already has active connection from another controller |
| 0x0103 | Transport class not supported | RPI too fast for transport class |
| 0x0106 | Ownership conflict | Forward Open rejected — ownership conflict |
| 0x0107 | Connection not found | Connection serial number not found during Forward Close |
| 0x010D | Invalid configuration size | Module configuration size mismatch |
| 0x010F | Out of connections | Target device has no available connections |
| 0x0111 | RPI not supported | Requested RPI is too fast for the target device |
| 0x0113 | Connection timeout | Connection did not receive packets within timeout |
| 0x0114 | Unconnected message timed out | Unconnected message did not receive reply |
| 0x0115 | Parameter error | Invalid Forward Open parameter |
| 0x0116 | Message too large | Connection size exceeds network packet limit |
Fault Code Quick Reference Table
This consolidated table covers the most common fault type/code combinations encountered in production environments. Bookmark this section for rapid lookup during troubleshooting.
| Fault Type | Fault Code | Short Description | Immediate Action |
|---|---|---|---|
| 1 | 1 | Memory corruption | Power cycle; reload project |
| 1 | 3 | Battery low/missing | Replace battery |
| 1 | 5 | Flash memory failure | ControlFLASH firmware update |
| 3 | 1 | I/O connection request timeout | Check network and module power |
| 3 | 3 | I/O connection timed out (running) | Check Ethernet cable and switch |
| 3 | 17 | Module inhibited | Remove inhibit in I/O tree |
| 3 | 18 | Forward Open rejected | Check connection limits and ownership |
| 4 | 1 | Array subscript out of bounds | Add LIM check before array access |
| 4 | 17 | Numeric overflow | Widen data types; add range checks |
| 4 | 18 | Division by zero | Add zero-check before division |
| 4 | 20 | Illegal instruction | Check instruction context and parameters |
| 4 | 21 | JSR nesting too deep | Flatten program hierarchy |
| 4 | 30 | JMP to undefined label | Verify all JMP/LBL pairs exist |
| 4 | 42 | Task watchdog timeout | Increase watchdog period; optimize scan time |
| 6 | 1 | FIFO/LIFO stack overflow | Check empty/full before push/pop |
| 6 | 3 | SFC step timeout | Debug transition condition; increase timeout |
| 7 | 1 | System watchdog expired | Reduce CPU load; check hardware |
| 8 | 1 | Invalid mode transition | Clear major fault before switching to Run |
| 11 | 1 | Axis hardware fault | Clear drive fault; issue MAFR |
| 11 | 2 | Following error exceeded | Increase PE limit; re-tune gains |
| 11 | 4 | Software travel limit hit | Issue MASD; re-home axis |
| 11 | 7 | iCIP motion connection lost | Check Ethernet to drive |
| 13 | 1 | Module-defined fault | Check specific module LED and documentation |
| 13 | 3 | Connection timed out | Check network and module |
| 13 | 5 | Module key mismatch | Reconcile project config with physical hardware |
| 13 | 16 | Safety I/O connection fault | Follow safety recovery procedure |
Frequently Asked Questions
What is a Type 4 Code 42 major fault?
A Type 4, Code 42 major fault is a task watchdog timeout. The Logix5000 controller assigns a watchdog timer to each task (Continuous, Periodic, or Event). If a task does not complete one full scan within the configured watchdog period — which defaults to 500 ms for continuous tasks — the controller immediately halts program execution and generates a Type 4, Code 42 major fault.
The most common causes are: a large FOR loop added to the scan path without adjusting the watchdog period, excessive computation in the continuous task, or a code change that created a very long execution path. To resolve it: first, increase the task watchdog period temporarily (Task Properties → General → Watchdog) to allow normal operation while you investigate. Then use the Task Monitor tool in Studio 5000 (Controller Properties → Tasks → Monitor) to identify which task is taking excessive time and optimize accordingly.
How do I clear a major fault on an Allen-Bradley PLC?
There are four methods to clear a major fault, in order of preference:
- Studio 5000 (recommended for diagnostics): While online, go to Controller Properties → Major Faults tab → read and record the fault type and code → click Clear Major Faults → switch the controller to Run mode.
- Keyswitch method: Turn the keyswitch from Run to Program to Run. This clears the major fault if the fault is recoverable, but you will lose the fault record details.
- CLF instruction in fault handler: If a fault handler routine is programmed with a CLF instruction and appropriate conditional logic, the controller can automatically clear specific recoverable faults without operator intervention.
- Power cycle: For non-recoverable faults, power cycling is required. This clears the fault state but does not address the underlying cause.
Always diagnose the root cause before clearing any major fault. Clearing without fixing guarantees recurrence.
What causes watchdog faults in CompactLogix?
Watchdog faults on CompactLogix arise from three root causes:
Excessive scan time: The most common cause. A single routine or instruction taking too long — usually a large FOR loop, a complex structured text algorithm, or a high-iteration string-processing routine.
Task configuration mismatch: A periodic task with a period shorter than its actual execution time. For example, a 10 ms periodic task that actually takes 15 ms will overlap and eventually starve, triggering a watchdog.
Hardware resource contention: In rare cases, background system tasks (EDS parsing, firmware update processes, excessive online edit compilation) temporarily consume CPU cycles, pushing the user task over its watchdog threshold.
Diagnostic approach: Enable the Task Monitor in Studio 5000, take the controller online, and watch the Execution Time column for each task across several scans. Any task approaching its watchdog period within 80% deserves attention.
How do I program a fault handler in Studio 5000?
Programming a fault handler involves five steps:
- Create a new routine in the controller scope (not inside a program) and name it (e.g.,
Ctrl_FaultHandler). - Assign it in Controller Properties → Advanced → Controller Fault Handler.
- At the start of the routine, use a GSV instruction to read
CONTROLLER.MajorFaultRecordinto a DINT array. - Use EQU or other compare instructions to check FaultType and FaultCode.
- For faults you want to auto-recover from, conditionally execute a CLF instruction. For all faults, execute logging and HMI notification logic.
The fault handler routine must complete within 4 seconds; otherwise the controller will enter Fault mode regardless of the handler's intent.
What does a solid red FAULT LED mean?
A solid red FAULT LED means the controller has a major fault and program execution has halted. The controller is in Faulted mode — it is not executing the user program, and all outputs are in their configured fault state (typically de-energized unless configured otherwise in the module properties).
A flashing red FAULT LED is a different condition — it indicates a minor fault, and the program continues to execute normally. You will see the FAULT LED flash when, for example, the battery is low.
To determine the specific fault: connect with Studio 5000 → Controller Properties → Major Faults tab, or read the 7-segment display on controllers that have one.
How do I read fault codes programmatically with GSV?
Use the GSV instruction with Class Name CONTROLLER and Attribute Name MajorFaultRecord. The destination should be a DINT array of at least 6 elements. Index 0 contains the fault type, index 1 contains the fault code, and index 2 contains the extended fault info.
For building an HMI fault display, combine this with a SSV (Set System Value) to acknowledge the fault, and store the fault records in a circular DINT buffer in the controller. The HMI then reads the buffer and formats the fault type and code into a human-readable description using a lookup table or string array.
For automated fault response systems, place the GSV in the Controller Fault Handler routine so it executes immediately when the fault occurs, before any potential timeout. See the Fault Handler Programming section for complete code examples.
What is the difference between major and minor faults?
The critical difference is the effect on program execution. Major faults halt the controller — the user program stops executing, all outputs go to their configured fault state, and the FAULT LED is solid red. The controller will not return to Run mode until an operator explicitly clears the fault.
Minor faults do not stop the program. The controller continues executing normally while the fault is logged. The FAULT LED flashes red. Minor faults are self-limiting conditions — things like a single failed network retry, a battery warning, or an I/O module that briefly lost connection but reconnected.
Both types are time-stamped and stored in separate logs (major: up to 6 entries; minor: up to 16 entries) accessible through Controller Properties in Studio 5000.
A minor fault can escalate to a major fault if the condition persists or is configured to do so. For example, repeated I/O connection failures that exceed the configured retry count will escalate from a minor fault to a major Type 3 fault.
Why does my PLC keep faulting on power-up?
Repeated power-up faults are most commonly caused by four conditions:
Battery failure: A dead or missing battery causes the controller's non-volatile memory to lose its contents on power loss. On power-up, the controller detects a corrupted or absent program image and faults with a Type 1 fault. Replace the battery and reload the program from backup.
Corrupted project image: If power was lost during a download or during a non-volatile memory write operation, the stored program image may be corrupted. The solution is to manually put the controller in Program mode (if possible), clear the controller memory, and perform a fresh download.
Duplicate IP address: On EtherNet/IP networks, if another device claims the controller's IP address before the controller finishes initializing, the controller may fault with a Type 1, Code 14 fault during power-up initialization. Audit the network for IP conflicts and use DHCP reservation or static IP assignments throughout the system.
Firmware version mismatch after hardware replacement: If a controller was replaced with one carrying a different firmware version that is incompatible with the stored project, power-up faults occur. Use ControlFLASH to update the replacement controller to the correct firmware revision before downloading the project.
Continue Your Allen-Bradley Troubleshooting Knowledge
This fault code reference pairs directly with several other guides on this site. If you are building out your troubleshooting skills on the Allen-Bradley platform, the RSLogix 5000 programming guide covers the programming fundamentals that underpin most Type 4 program execution faults. Understanding the Siemens vs Allen-Bradley platform comparison is valuable if you support both platforms and need to translate your diagnostic approach between them.
For engineers pursuing formal credentials in Allen-Bradley systems, the PLC programmer certification guide outlines the fault diagnosis competencies assessed in Rockwell's training and certification programs.
Get the Ladder Logic Code Pack: Our Ladder Logic Code Pack includes a complete, production-ready Fault Handler routine for CompactLogix and ControlLogix with GSV-based fault logging, HMI notification bits, selective auto-clear logic for common nuisance faults, and a pre-built circular fault history buffer. The pack saves hours of development time and follows all patterns described in this guide.
Now run it · free to start
Practise Allen-Bradley-style logic in your browser
Work XIC, XIO, OTE, TON and CTU logic without a Studio 5000 licence. An independent learning tool — free to start, no install.
Ownership disclosure: PLC Programming IO and PLC Simulation Software are operated by the same publisher.