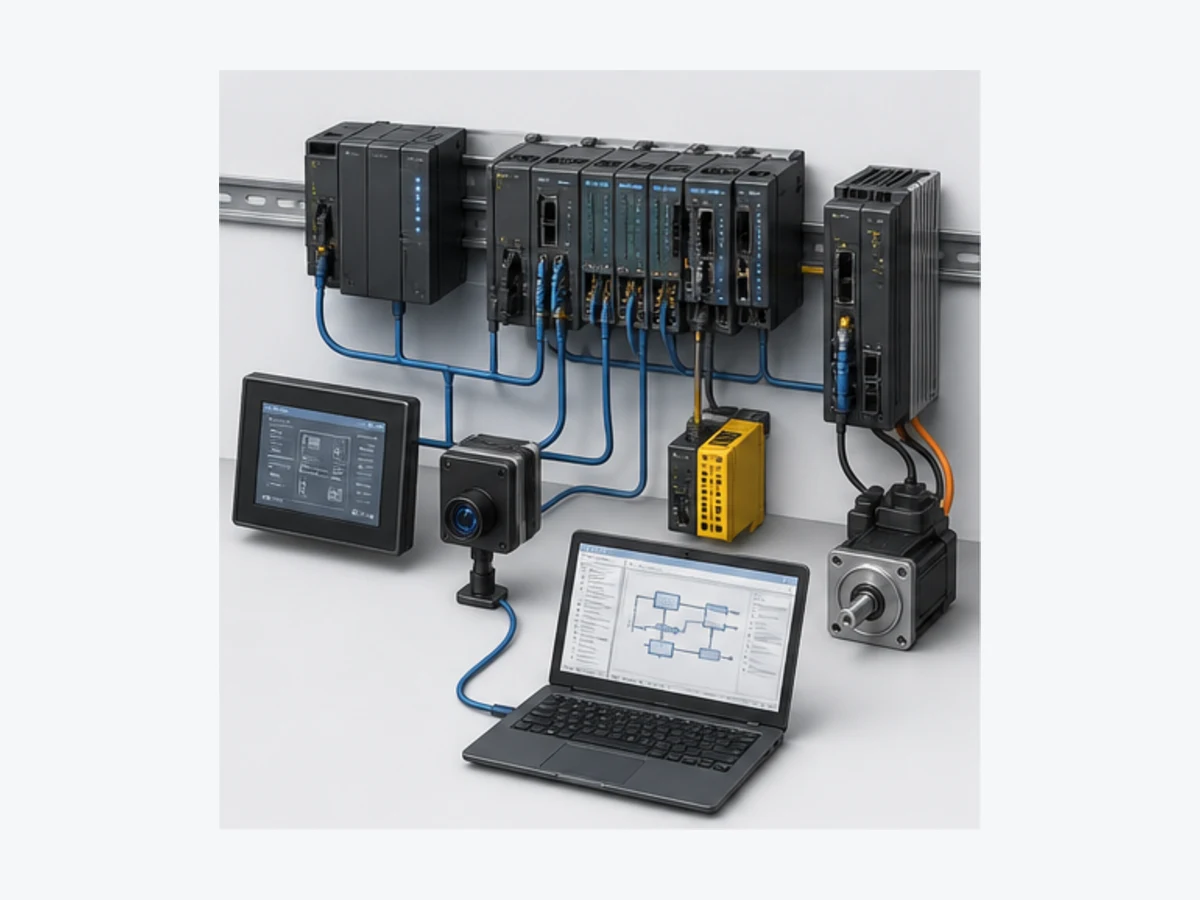
Keyence PLC Programming Tutorial: KV STUDIO Guide
Learn the Keyence PLC workflow in KV STUDIO: trial access, device addressing, a motor-latch example, simulation, and model-selection checks.
Keyence PLCs use KV STUDIO as their engineering environment. Keyence publishes a downloadable trial version for the KV-X series; that is not the same as saying the complete production software is free for every user and controller. Licensing, registration, supported controllers, and regional availability should be checked on Keyence's current pages before a project starts.
Introduction: Master Keyence PLC Programming for Vision and High-Speed Automation
Keyence PLCs are commonly considered where machine control must coordinate sensors, inspection, motion, and production data in one engineering workflow. The practical question is not whether the platform is universally “best,” but whether the selected CPU, communications, I/O, software entitlement, and local support fit the machine.
The KV family spans compact and modular controllers. Vision systems can exchange triggers, results, and measurements with the controller, but actual topology and cycle time depend on the chosen PLC, vision controller, camera, network, program, and mechanical process.
This tutorial covers the durable parts of the workflow: trial access, project setup, device addressing, a motor start/stop example, simulation, and a conceptual vision handshake. Model-specific limits and instructions are deliberately sent back to the current Keyence catalog and manuals.
Practice the platform-neutral motor and inspection-handshake states in the browser. The simulator does not emulate KV firmware, Keyence vision tools, electrical I/O or safety certification.
Verification note (reviewed July 25, 2026): Product and licensing statements on this page were checked against Keyence's official KV-X product page and official KV-X/KV STUDIO trial page. Keyence's trial page confirms that a trial is available, while the product page describes the KV-X site-license policy. The worked programs below are educational examples, not vendor-certified project files; validate instruction names, addresses, safety behavior, and timing in the current manual and on the target hardware.
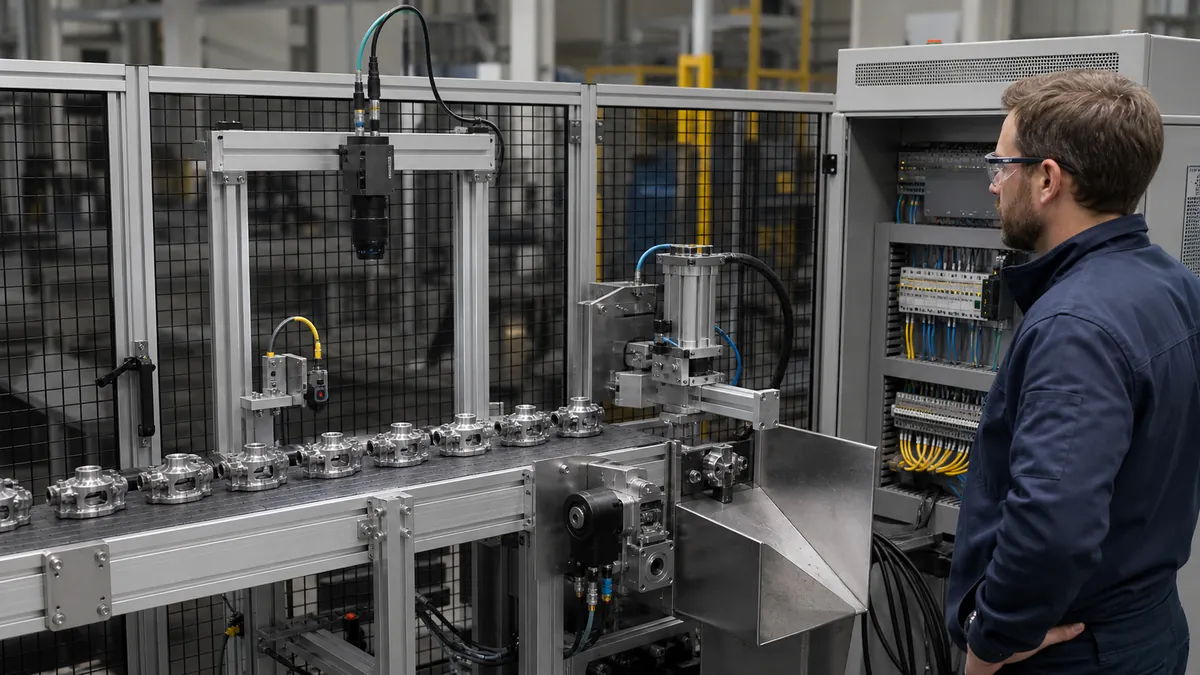
What Is KV STUDIO and Which PLCs It Supports
KV STUDIO is Keyence's dedicated PLC programming environment and the single tool you use across the entire KV family. Understanding the product taxonomy before you open the software saves significant confusion.
KV family taxonomy:
- KV Nano — a compact controller family for smaller machines. Confirm the exact base-unit I/O and expansion options by catalog number.
- KV-5500 / KV-7500 / KV-8000 — building-block controller families. Available functions differ by CPU and attached units, so select from a bill of requirements rather than a family-name shortcut.
- KV-X — Keyence's current next-generation PLC line. Its official page confirms a quad-core CPU, an IEC 61131-3-compliant KV STUDIO environment, a machine-operation recorder, OPC UA through the CPU communication port, and 256 EtherNet/IP connections.
Version policy: This page does not hard-code a KV STUDIO point release because Keyence updates its software. Record the installer version, controller firmware, and manual revision used for each production project.
How to Download KV STUDIO (Free Trial)
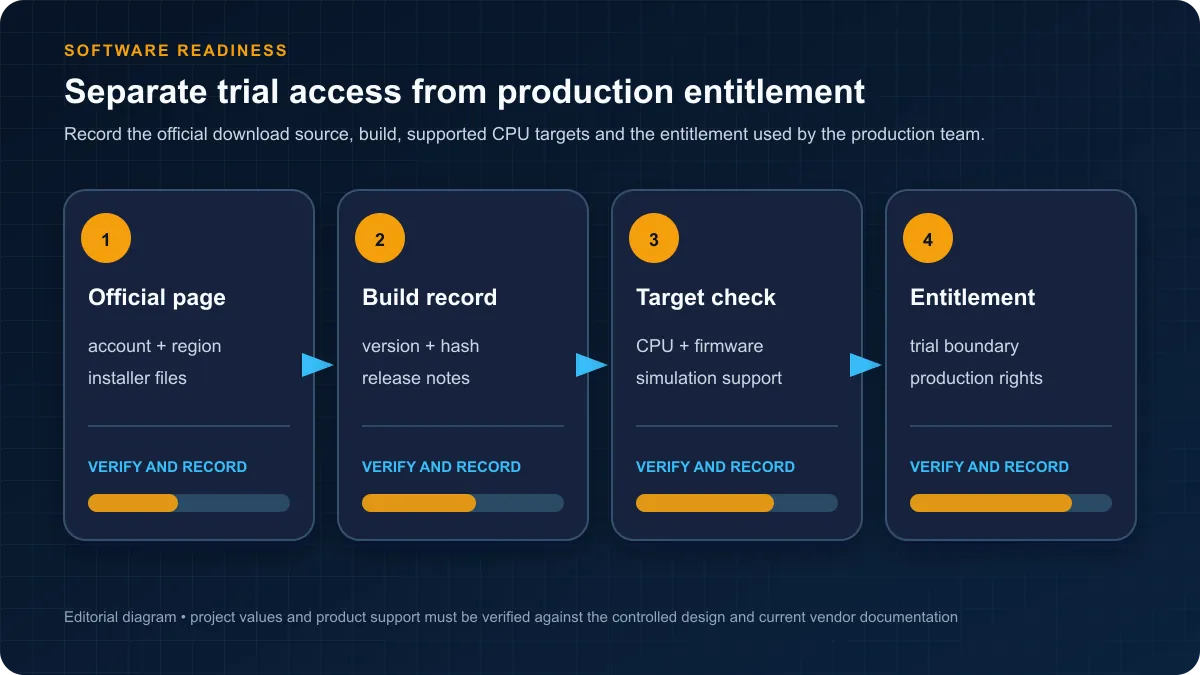
A KV-X series trial version of KV STUDIO is listed on Keyence's official trial page. The page provides split download files and currently prompts users to create or sign in to a Keyence account. Use that page—not a third-party mirror—for the current installer and installation notes.
Do not assume that “trial” means a perpetual free production license. Confirm the current trial terms, supported controller targets, expiry or feature limits, and commercial entitlement for your region before relying on it.
Keyence's KV-X product page separately describes a company site-license policy with free installation and updates within a company. Treat that as a vendor licensing statement for KV-X, not proof that every legacy KV product, subsidiary, contractor, or region receives identical terms.
Practical first step: Download from the official page, record the software build shown by the installer, then confirm which CPU targets and simulation functions are available in that build before following the example below.
Keyence Device Addressing
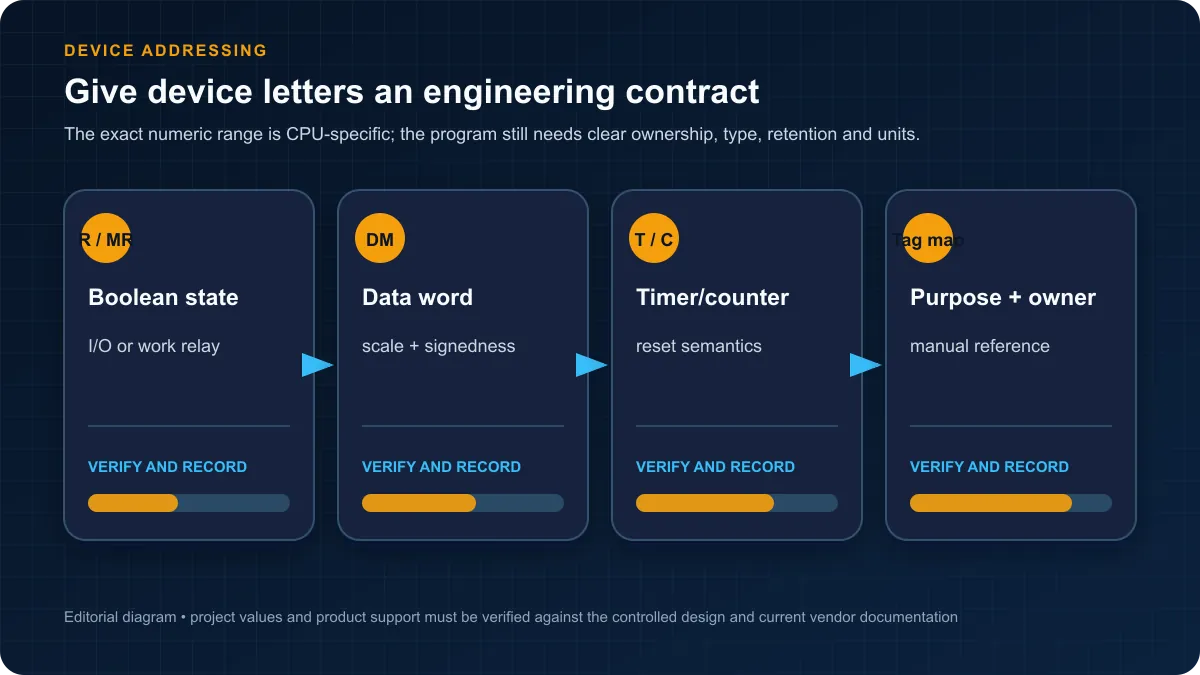
KV STUDIO uses a consistent device-letter scheme. Knowing the primary device types is essential before writing your first rung.
| Device | Letter | Type | Notes |
|---|---|---|---|
| Relay (I/O and internal) | R | Bit | Covers both physical I/O-mapped relays and internal relays; includes MR as a sub-range |
| Memory relay (internal) | MR | Bit | Internal/work bits for intermediate logic; no physical I/O mapping |
| Data memory | DM | 16-bit word | General-purpose data registers; retention is CPU- and configuration-specific |
| Timer | T | Bit + word | Timer contact (T) plus current-value register |
| Counter | C | Bit + word | Standard counter contact plus current value |
| High-speed counter | CTH | Word | Hardware-based high-speed counting; used with encoder and pulse inputs |
Additional device types you will encounter in the manuals include CR (control relay / special relay area), LR (link relay, used in PLC-link communication), and TM (timer current value). Specific numeric ranges for each device depend on the CPU model — always reference the Keyence KV Series Programming Manual for your controller rather than relying on third-party range summaries, as the ranges differ between KV Nano, KV-5500, KV-8000, and KV-X.
Addressing convention: Devices are written as a letter prefix followed by a decimal number (e.g., DM100, MR50, CTH0). Timer and counter contacts share their number with the current-value register, so T5 can refer to both the timer-done contact (used in a rung condition) and the accumulated-value word (used in a comparison instruction) depending on context.
KV Nano vs KV-8000: Which to Use
These two sit at opposite ends of the KV range and represent genuinely different design philosophies.
KV Nano is an all-in-one terminal-block unit. CPU, power supply, and I/O are integrated into a single body with no expansion capability. It targets embedded OEM equipment, laboratory instruments, and applications where panel space is the binding constraint. Programming in KV STUDIO is identical to any other KV model, so skills transfer directly. It is not a stepping stone to be dismissed — many production machines run on KV Nano for years.
KV-8000 is a modular building-block family found in existing machines. For a retrofit, verify the exact CPU, units, firmware, manuals, and vision-system topology rather than relying on a family-level summary.
Decision guide:
- Space-critical embedded control, simple standalone machine, OEM product with fixed I/O: KV Nano
- Quality inspection line, vision-guided automation, large modular machine, high I/O count: KV-8000 (or KV-7500 for EtherCAT motion focus)
- Next-generation build with OPC UA, EtherCAT master, IEC 61131-3 environment: KV-X
Axis counts, exact cycle-time figures, and I/O maximums should be confirmed from the current Keyence datasheets for your selected model, as these specifications are revised between hardware generations.
Your First KV STUDIO Program (Worked Example)
This walkthrough takes you from an empty KV STUDIO installation to a simulated motor start/stop program.
Step 1 — Create a new project.
Open KV STUDIO and select New Project. Give it a name (e.g., MotorStartStop).
Step 2 — Select your CPU. Choose the CPU model that matches your hardware and software entitlement. The selected target controls the available units, memory areas, and instructions.
Step 3 — Configure I/O in the Unit Editor. Open the Unit Editor and add any expansion modules you need. For this example, accept the base unit defaults. Assign labels to the I/O you will use:
X0  → START_BUTTON     (Normally Open pushbutton)
X1  → STOP_BUTTON      (Normally Closed pushbutton)
X2  → OVERLOAD_RELAY   (Normally Closed overload contact)
Y0  → MOTOR_CONTACTOR
Step 4 — Write the latched motor start/stop rung.
A motor start/stop circuit requires latching: once the start button is pressed and released, the motor must continue running until stop or overload is pressed.
Rung 1: Latched Motor Start / Stop

|--[X0 START]--+--[Y0 MOTOR]--|--[X1/ STOP]--[X2/ OVL]--[OUT Y0]--|
               |              |
               +--[Y0 MOTOR]--+
In plain language:
- Rung condition: (START pressed OR motor already running) AND STOP is closed AND OVERLOAD is closed
- Output: energise MOTOR_CONTACTOR (Y0)
- The Y0 contact in parallel with X0 is the latch — once the motor starts, it seals in through its own contact
Step 5 — Add a run-hours counter (optional but instructive).
Rung 2: Run-time accumulated counter (1-second base)

|--[Y0 MOTOR]--[TON T0 1s]--|
               |
               +--[T0]--[CTU C0]--[RESET T0]--|

Rung 3: Store count in data memory

|--[MOVE C0 DM10]--|     // Copy motor run-seconds count to DM10
Step 6 — Simulate. Click Simulate in the toolbar. In the supported simulator for your target/build, exercise a momentary Start and the configured Stop condition, then inspect the output and timer states. Simulation can validate the modeled logic; it does not prove field I/O polarity, electrical timing, firmware behavior or the physical machine.
Coming from Allen-Bradley or Mitsubishi?
If your background is in Rockwell or Mitsubishi systems, KV STUDIO has a practical bridge that significantly reduces the learning curve.
Rockwell mnemonic compatibility: KV STUDIO lets you type Rockwell instruction mnemonics directly into a ladder cell. For example, typing XIC inserts a Normally Open contact (equivalent to Keyence's standard NO contact), and OSR inserts a one-shot rising-edge detect instruction (equivalent to Keyence's DIFU). KV STUDIO auto-translates the mnemonic into the native KV instruction. This is a genuine productivity feature for engineers who think in Rockwell terminology — you can build rungs at speed without constantly looking up KV instruction names.
Note: this is Rockwell mnemonic input compatibility, not a claim that KV STUDIO's interface replicates Studio 5000's look and feel. The environments are distinct; the mnemonic shortcut is a convenience layer.
Coming from Mitsubishi GX Works: The KV addressing scheme (R, MR, DM, T, C) maps conceptually to Mitsubishi's M, D, T, C devices. The biggest adjustment is that KV uses decimal addressing throughout rather than the octal-based X/Y I/O addressing in some Mitsubishi systems. KV STUDIO's label system mitigates this: name your I/O with descriptive labels immediately and you rarely need to think about raw device numbers.
Structured Text in KV STUDIO
KV STUDIO supports both Ladder Diagram and Structured Text as programming languages. For most KV series controllers, these are the two available editors within a single project.
Using Structured Text: You can write ST code in dedicated function blocks or program sections alongside ladder logic. The two languages share the same project memory, so a value written in an ST block is immediately visible to ladder rungs in the same scan — there is no separate memory space for each language.
A simple ST example that mirrors the motor latch logic above:
(* Motor start/stop in Structured Text *)
IF START_BUTTON OR MOTOR_CONTACTOR THEN
    IF STOP_BUTTON AND OVERLOAD_RELAY THEN
        MOTOR_CONTACTOR := TRUE;
    END_IF;
ELSE
    MOTOR_CONTACTOR := FALSE;
END_IF;
IEC 61131-3 environment: Keyence describes the KV-X KV STUDIO environment as IEC 61131-3 compliant. That statement alone does not prove that every language, editor, or feature is enabled for every controller and license. Check the current target-specific manual before designing around a particular language.
When to use ST or ladder: Structured Text can suit data transformation, calculations and algorithm-heavy ordinary control. Ladder can make ordinary I/O paths and interlocks easier for some teams to inspect online. Required safety functions must use the approved safety architecture, supported safety tooling and validation process; language appearance alone does not make logic safety-rated.
Keyence KV Series PLC Product Lines: Choosing Your Platform
The model names alone are not a safe specification. Start with the machine requirements, then confirm them against the current Keyence catalog:
| Requirement to verify | Why it changes the choice |
|---|---|
| Local and remote I/O | Determines the CPU, base unit, expansion units, and network topology |
| Motion axes and update time | Determines whether simple positioning or a motion-oriented configuration is required |
| Vision handshake | Determines the camera/vision controller, trigger wiring, result data, and latency budget |
| Industrial networks | Confirm EtherNet/IP, EtherCAT, OPC UA, serial, and other required roles—not just protocol names |
| Retention and logging | Confirm storage capacity, write behavior, timestamping, and recovery requirements |
| Safety | Safety functions require a verified safety architecture; standard PLC logic is not a substitute |
| Software entitlement | Confirm trial, site-license, contractor, and deployment rights for the exact organization |
What Keyence Currently Confirms for KV-X
Keyence's current KV-X page identifies it as the next-generation building-block platform and publishes the following facts:
- quad-core CPU;
- an IEC 61131-3-compliant KV STUDIO development environment;
- a machine-operation recorder that captures devices, cameras, and events around a fault;
- OPC UA through the CPU communication port and 256 EtherNet/IP connections;
- 128 MB program capacity and a published minimum LD instruction execution time of 0.50 ns; and
- a company site-license policy described as free installation and updates within a company.
Those are vendor-published headline specifications, not a complete system design. Confirm environmental ratings, module compatibility, network load, safety approvals, firmware, and regional licensing in the current catalog and quote.
How to Compare Legacy KV Families
For KV-5500, KV-7500, KV-8000, KV Nano, and any installed legacy controller, use the exact catalog number and manual revision. Do not infer memory, I/O, axis, camera, or protocol limits from a family label. If the project is a retrofit, first upload and archive the existing project, record firmware and unit configuration, and verify whether the current KV STUDIO build can open and transfer it without conversion risk.
Pricing is intentionally omitted here. Keyence provides a price-request path, and a complete system price depends on CPU, I/O, communication, safety, motion, vision, software entitlement, support, and region.
KV STUDIO Programming Software: Your Development Environment
Trial, Site License, and System Requirements
Use the official trial page for the current KV-X trial files. Use the installer documentation supplied with that build for operating-system, processor, memory, storage, and display requirements; hard-coding those requirements here would become stale.
For production deployment, distinguish the trial from the KV-X site-license statement on the official product page. Confirm how that policy applies to your company, sites, contractors, and target controllers with Keyence.
KV STUDIO Interface and Project Creation
The exact menus and available editors vary with the installed KV STUDIO build and selected CPU. The durable workflow is to select the exact target, reproduce the physical unit configuration, create labels, compile, simulate what the target supports, and then commission under a controlled test plan.
Creating Your First Project:
- Launch KV STUDIO and select "New Project" from startup screen
- Select PLC Model: Choose your specific KV controller (KV-8000, KV-7500, KV-5500, etc.)
- Configure I/O: Define base unit and expansion module configuration matching physical hardware
- Set Communication: Configure programming connection (USB, Ethernet, RS-232)
- Create Program: Begin ladder logic programming in main program editor
Project Organization Structure:
- Main Program: Primary ladder logic controlling machine operation
- Subroutines: Reusable program blocks for common functions
- Interrupt Programs: High-speed event handling routines
- Integration data: Trigger, busy, complete, result, measurement, and fault data exchanged with external devices
- Data Tables: Recipe storage, setpoint values, configuration parameters
- Device Memory: Allocation of internal relays, data registers, timers, counters
Built-In Simulator for Offline Development
Where the selected target supports simulation, use it to test basic sequence logic before connecting to equipment.
Simulation Capabilities:
- Execute ladder logic with virtual I/O forcing
- Monitor and modify data registers in real-time
- Test timer and counter operation
- Verify subroutine logic and program flow
- Debug complex sequences before hardware deployment
Simulator Limitations: Simulation cannot replicate real-world timing-critical operations, high-speed counter behavior, actual vision processing results, or physical I/O electrical characteristics. Always verify simulated programs on actual hardware before production deployment.
Online Editing for Live Programming
Online-change capabilities and restrictions are model-, firmware-, project-, and instruction-dependent. Confirm the supported workflow in the current manual and your site's management-of-change procedure before modifying a running controller.
Online Editing Workflow:
- Connect to Running PLC: Establish communication via Ethernet or serial
- Upload Current Program: Retrieve running program from PLC memory
- Enter Edit Mode: Enable online editing functionality
- Make Modifications: Edit specific ladder rungs or parameter values
- Download Changes: Transfer only modified sections to PLC
- Verify Operation: Confirm changes function correctly without disrupting operation
Safety Considerations: Online editing introduces risks of inadvertent machine behavior changes during production. Always verify modifications in offline simulation first, implement change control procedures, and consider using write-protection features to prevent accidental programming during production operation.
Check Instructions and Libraries Against the Target
Do not assume that a named motion, communication, PID, logging, or vision instruction exists on every KV CPU. In KV STUDIO, select the exact controller and unit configuration, then check the target-aware instruction list and current manual. For reused code, record the original CPU, firmware, KV STUDIO build, library revision, and test result.
Integration with Vision System Software
Treat the PLC and vision system as separate, testable subsystems unless the current manuals for the selected products explicitly document a tighter workflow. Define the data contract first: trigger, busy, complete, pass/fail, measurement values, recipe identity, fault, timeout, and reset.
Vision Programming Workflow:
- Configure the vision system: Set exposure, optics, lighting, and inspection tools in the supported vision software
- Define inspections: Create and validate the required measurement or recognition tools
- Map the handshake: Assign trigger, status, result, measurement, recipe, timeout, and fault data
- Trigger Logic: Program PLC ladder logic to trigger image capture at precise moments
- Decision Making: Use vision results in ladder logic for part acceptance/rejection
Cycle time must be measured on the actual system. It includes exposure, image transfer, processing, PLC/network update, program execution, and mechanical response; no universal latency is asserted here.
Keyence Ladder Logic Programming Fundamentals
Keyence Instruction Set Overview
Comprehensive Yet Accessible Commands: Keyence ladder logic implements the IEC 61131-3 ladder diagram standard while adding manufacturer-specific instructions optimized for high-speed automation, vision integration, and motion control. The instruction set balances simplicity for basic applications with advanced capabilities for demanding requirements.
Instruction Categories:
Basic Contact and Coil Instructions:
- Normally Open Contact (NO): Conducts when addressed bit is ON
- Normally Closed Contact (NC): Conducts when addressed bit is OFF
- Output Coil: Sets addressed bit ON when energized
- Set Coil: Latches bit ON until reset
- Reset Coil: Forces bit OFF
- Rising Edge Detect: Triggers one scan on OFF-to-ON transition
- Falling Edge Detect: Triggers one scan on ON-to-OFF transition
Timer Instructions:
- TON (On-Delay Timer): Delays turning ON after input energizes
- TOF (Off-Delay Timer): Delays turning OFF after input de-energizes
- TP (Pulse Timer): Generates fixed-duration pulse
- Retentive Timer: Accumulates time across power cycles
Counter Instructions:
- CTU (Count Up): Increments on rising edge
- CTD (Count Down): Decrements on rising edge
- CTUD (Up/Down Counter): Bidirectional counting
- High-Speed Counter: Hardware-based event counting; confirm the published frequency limit for the target input
Data Movement and Math:
- MOV (Move): Copy data between registers
- BMOV (Block Move): Copy multiple consecutive registers
- ADD, SUB, MUL, DIV: Arithmetic operations (16-bit and 32-bit)
- INC, DEC: Increment/decrement by 1
- SQRT, ABS, NEG: Mathematical functions
- BCD, BIN: Number base conversions
Comparison Instructions:
- Equal (=), Not Equal (<>), Greater Than (>), Less Than (<)
- Greater or Equal (>=), Less or Equal (<=)
- Range Check: Verify value within bounds
Logical Operations:
- AND, OR, XOR: Bitwise logic operations
- NOT: Bit inversion
- Shift/Rotate: Bit manipulation operations
Memory Organization and Addressing
Understanding Keyence Memory Structure: KV series PLCs organize memory into functional areas with specific purposes and characteristics. Understanding memory organization is fundamental to efficient program design and troubleshooting.
Common areas include relays/bits, data memory, timers, counters, and physical I/O. The available ranges, numeric widths, retentive behavior, timer bases, counter limits, and I/O notation depend on the exact CPU and project settings. Never copy an address-range table from another KV family into a production design.
For this tutorial, names such as R100, DM100, T0, C0, X0, and Y0 are illustrative placeholders. In a real project:
- confirm the address exists for the selected target;
- document whether the value is volatile or retained;
- use descriptive labels so the control intent is reviewable; and
- verify the resulting I/O map against the electrical drawings before download.
Programming Example: Product Inspection Sequence
Application Overview: Automated quality inspection station for electronics components using conveyor transport, presence sensing, vision inspection, and pneumatic rejection. The following is architecture pseudocode, not copy/paste KV STUDIO syntax. Replace the addresses, instruction names, and times with values validated for the selected hardware.
System Components:
- Part presence sensor (Input X0)
- Vision inspection trigger (Output Y0)
- Vision OK result from CV-X camera (R1000)
- Reject air cylinder extend (Output Y1)
- Accept bin counter increment (Input X1)
- Emergency-stop status from a separately designed safety system (Input X10)
Ladder Logic Program:
Rung 1: Emergency Stop Safety Monitoring
|--[X10/]--[MC N0]--|     // Master control OFF if E-stop pressed
|                    |
| Emergency Stop Monitor and Alarm |

Rung 2: Part Detection and Vision Trigger
|--[X0]--[R0/]--[SET R1]--|     // Detect part, set inspection request
|                          |
| Part Presence Sensor Rising Edge Detection |

Rung 3: Vision Capture Timing Pulse
|--[R1]--[TON T0]--|     // 50ms delay for part positioning
|       |  50ms    |
|       +--[T0]--[OUT Y0]--[TP T1]--|  // Pulse vision trigger
|              |     50ms            |
|              +--[T1]--[RESET R1]--|  // Clear inspection request

Rung 4: Vision Result Evaluation (Check after 200ms processing)
|--[T1]--[TON T2]--|     // Wait 200ms for vision processing
|       |  200ms   |
|       +--[T2]--[R1000]--[CTU C0]--[SET R10]--|  // Good part detected
|       |        |              1              |
|       |        +--[R1000/]--[SET R11]--[RESET T2]--|  // Bad part - reject flag

Rung 5: Reject Mechanism Control
|--[R11]--[TON T3]--|     // Delay to rejection position
|        |  150ms   |
|        +--[T3]--[OUT Y1]--[TP T4]--|  // Extend reject cylinder
|                  |     300ms       |
|                  +--[T4]--[RESET R11]--|  // Retract, clear flag

Rung 6: Accept Counter Update
|--[R10]--[X1]--[CTU C1]--[RESET R10]--|     // Count accepted parts
|              |    1                  |
| Accept Bin Sensor Confirms Good Part |

Rung 7: Production Statistics
|--[MOVE C0 DM100]--|     // Copy current production count
|--[MOVE C1 DM101]--|     // Copy accept count
|--[SUB DM100 DM101 DM102]--|  // Calculate reject count
|--[DIV DM102 DM100 DM103]--|  // Calculate reject percentage
Program Explanation:
Rung 1 only illustrates monitoring an emergency-stop status. A standard PLC rung is not the safety function; use a risk-assessed safety relay or safety controller and verified final elements.
Rung 2 detects part arrival via presence sensor X0 using rising edge detection to set inspection request flag R1 exactly once per part.
Rung 3 illustrates a delayed vision trigger. The shown time is a placeholder that must be established from encoder position or measured mechanics.
Rung 4 evaluates vision inspection result from integrated CV-X camera system. If R1000 indicates pass (ON), production counter C0 increments and acceptance flag R10 sets. Failed inspection sets reject flag R11.
Rung 5 illustrates reject timing. The shown delay and pulse are placeholders; prove them across the full speed range and fail safely on missing or late results.
Rung 6 confirms accepted parts reached collection bin via sensor X1, incrementing accept counter C1 for quality tracking.
Rung 7 performs production statistics calculations, storing total production, accept count, reject count, and reject percentage in data memory for SCADA reporting.
Advanced Data Handling Techniques
Array Processing for Recipe Management:
Manufacturing operations frequently require storing and switching between multiple product recipes containing dozens of parameters (speeds, positions, temperatures, inspection tolerances). Keyence data memory arrays enable elegant recipe management:
Rung 1: Recipe Selection Based on Product Code
|--[X0]--[MOVE DM0 R0]--|     // Read product code from barcode
|--[MUL R0 100 R1]--|          // Calculate recipe offset (100 words per recipe)
|--[ADD R1 1000 R2]--|         // Add base recipe address (EM1000)

Rung 2: Load Recipe Parameters to Active Memory
|--[BMOV ER2 DM200 100]--|     // Block move 100 words from recipe to active area
|--[SET R100]--|                // Set "Recipe Loaded" flag

Rung 3: Use Recipe Parameters in Process Control
|--[MOV DM200 T0]--|            // Timer preset from recipe
|--[MOV DM201 DM500]--|         // Speed setpoint from recipe
|--[MOV DM202 DM510]--|         // Position target from recipe
This pattern illustrates indexed recipe storage. The number of recipes is limited by the target's memory, data representation, retention strategy, and validation requirements.
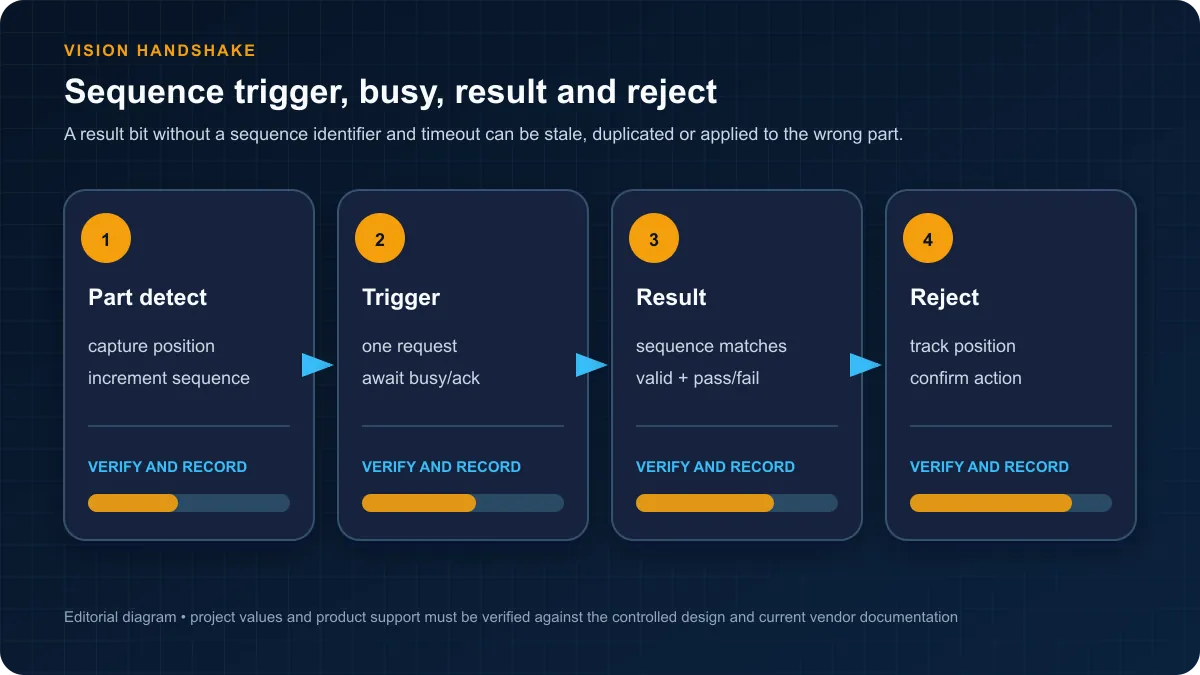
Vision System Integration: A Verifiable Handshake
Define the Architecture Before the Code
Begin with the documented physical architecture:
[Trigger sensor/encoder] → [PLC sequence]
                               ↓ trigger
                         [Vision system]
                               ↓ busy / complete / result / measurements / fault
                         [PLC decision] → [Reject or accept mechanism]
Do not assume that image processing happens in the PLC or that a particular camera connects directly to a CPU. Confirm the current controller, vision controller, camera, cable, protocol, and supported connection method from their exact catalog numbers.
Camera and Lighting Selection
Resolution, frame rate, field of view, lens mount, cable length, and supported camera count change by vision-system and camera model. Use the current Keyence vision catalog rather than the retired or unverified model table previously shown here.
Lighting Considerations: Vision system performance depends critically on proper illumination. Keyence offers comprehensive LED lighting systems including:
- Ring lights: General purpose illumination for component inspection
- Backlight units: High-contrast silhouette inspection
- Bar lights: Linear area illumination for web inspection
- Dome lights: Diffuse lighting eliminating reflections on shiny surfaces
- Coaxial lights: Specialized lighting for surface inspection
Vision Handshake in PLC Programs
The names below explain the handshake only. TRIG_CAM, VISION_RUN, VISION_RESULT, and VISION_DATA are pseudocode labels, not verified KV STUDIO mnemonics. Map the same states to the documented instructions or communication registers for your selected products.
Trigger a capture:
|--[Trigger Condition]--[TRIG_CAM CAM1]--|
|                                         |
| Captures image from specified camera when trigger condition becomes true |
Execute or select an inspection:
|--[Image Ready]--[VISION_RUN PROG1 CAM1]--|
|                                            |
| Executes vision program PROG1 on image from CAM1 |
Read the completed result:
|--[VISION_RESULT PROG1 R1000]--|
|                                 |
| Stores pass/fail result in R1000 (ON=Pass, OFF=Fail) |
Read measurement data:
|--[VISION_DATA PROG1 "WIDTH" DM100]--|
|                                       |
| Retrieves measured width value and stores in DM100 |
Vision Integration Example - Label Verification:
Application: Verify correct label applied to product packaging with barcode reading and position verification.
System Components:
- Selected vision camera and controlled illumination
- Product conveyor with encoder triggering
- Label "Present" sensor (X0)
- Encoder pulse input (X1) for position triggering
- Accept/Reject pneumatic diverter (Y0)
Ladder Logic Implementation:
Rung 1: Encoder-Based Image Trigger (Precision Positioning)
|--[X0]--[HSCT C100 X1 1000]--|     // High-speed counter: 1000 encoder pulses
|            |                 |
|            +--[C100]--[TRIG_CAM CAM1]--[RESET C100]--|

Rung 2: Execute Label Inspection Program
|--[R_CAM1_RDY]--[VISION_RUN "LABEL_CHECK" CAM1]--|
|                                                    |
| R_CAM1_RDY is system flag set when image captured |

Rung 3: Retrieve Barcode Reading Result
|--[VISION_RESULT "LABEL_CHECK" R1000]--|     // Pass/fail in R1000
|--[VISION_DATA "LABEL_CHECK" "BARCODE" DM100]--|  // Barcode value
|--[VISION_DATA "LABEL_CHECK" "X_POS" DM101]--|    // Label X position
|--[VISION_DATA "LABEL_CHECK" "Y_POS" DM102]--|    // Label Y position

Rung 4: Evaluate Label Position Tolerance
|--[R1000]--[GRT DM101 90]--[LSS DM101 110]--|     // X position 90-110mm OK
|         |                                   |
|         +--[GRT DM102 45]--[LSS DM102 55]--[SET R1001]--|  // Y position 45-55mm OK
| Combined pass: correct barcode AND position within tolerance |

Rung 5: Product Divert Control
|--[R1001/]--[TON T0]--|     // Failed inspection
|          |  250ms   |
|          +--[T0]--[OUT Y0]--[TP T1]--|  // Activate reject diverter
|                    |    500ms       |

Rung 6: Production Tracking
|--[R1001]--[CTU C0]--|     // Count accepted products
|--[R1001/]--[CTU C1]--|    // Count rejected products
|--[VISION_DATA "LABEL_CHECK" "PROC_TIME" DM200]--|  // Log processing time
Program Operation:
Parts move along conveyor with encoder providing precise position feedback. When label presence sensor X0 detects product, high-speed counter C100 begins counting encoder pulses. After exactly 1000 pulses (corresponding to precise camera field-of-view positioning), camera trigger fires capturing image at optimal position.
Vision program "LABEL_CHECK" executes automatically on captured image, performing barcode reading and label position measurement. Results transfer immediately to PLC memory: pass/fail status (R1000), decoded barcode value (DM100), and measured X/Y positions (DM101, DM102).
PLC ladder logic evaluates label position against acceptable tolerance ranges (90-110mm horizontal, 45-55mm vertical). Only products with correct barcode AND position within tolerances receive acceptance flag R1001.
Failed products trigger pneumatic diverter after 250ms delay (calculated to position failed product at reject chute), with 500ms pulse providing adequate divert time.
Production counters track accept/reject quantities while DM200 logs vision processing time for quality metrics and system optimization.
Complete Vision Application: Electronics Component Inspection
For a PCB inspection cell, turn the quality requirement into a testable interface before choosing part numbers:
| Design item | Evidence required before release |
|---|---|
| Presence/orientation checks | A labelled image set covering acceptable parts and known defects |
| Measurements | Gauge study, units, calibration method, tolerance, and uncertainty |
| Trigger | Sensor or encoder definition plus repeatability across the full speed range |
| Result handshake | Busy, complete, valid, pass/fail, measurement, recipe, fault, and timeout states |
| Reject tracking | A board ID or queue that prevents results being applied to the wrong part |
| Performance | Measured exposure, inspection, data-transfer, PLC, and mechanical response times |
| Quality | Documented false-accept and false-reject tests using a representative sample |
| Recovery | Defined behavior for timeout, stale result, communications loss, and power recovery |
No throughput, defect-detection rate, or system-cost result is claimed here because those values require a real, documented test. Use the pseudocode earlier in this guide only as a state-machine outline.
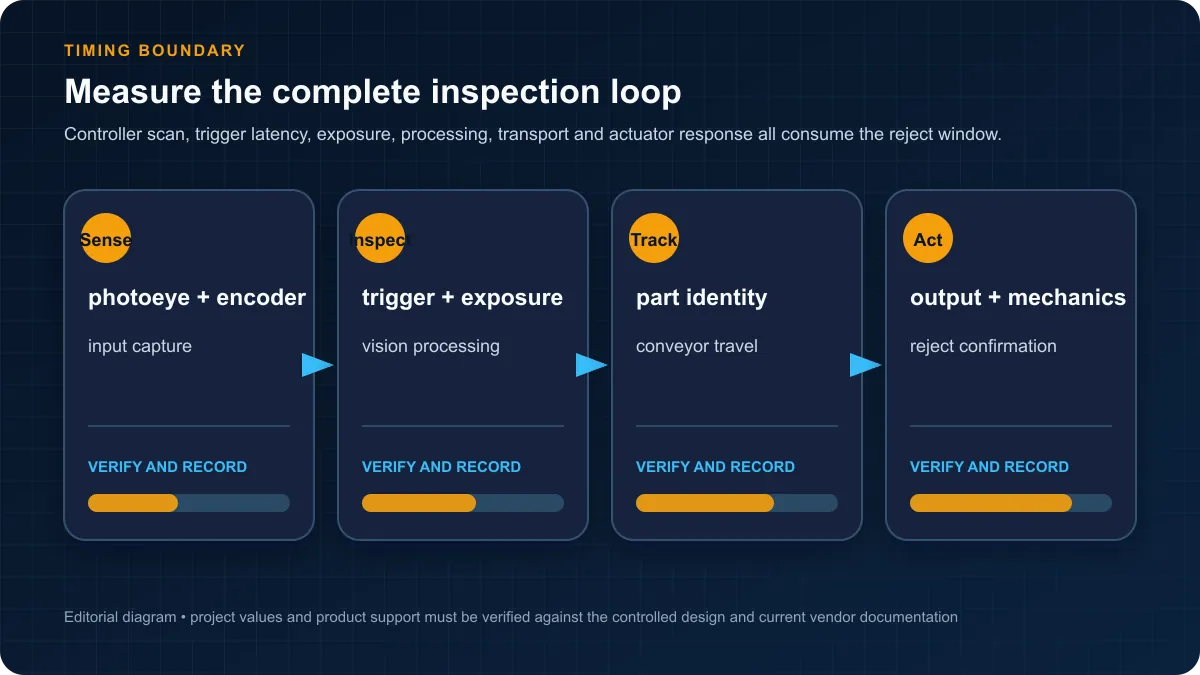
High-Speed I/O and Motion Control
High-speed counters, pulse outputs, and motion functions are target-specific. Before selecting a CPU or motion unit, calculate and document:
- the worst-case encoder or pulse frequency, including quadrature multiplication;
- electrical input type, voltage, filtering, cable, shielding, and maximum distance;
- axis count, interpolation, homing, registration, gearing, camming, and safety needs;
- the required update time and position accuracy at maximum machine speed;
- fault and recovery behavior for encoder loss, following error, drive fault, and communications loss; and
- the exact published limits for the selected CPU, module, firmware, and drive.
Instruction names such as HSCT_CFG, MOVE_ABS, GEAR_SETUP, and CAM_ENGAGE that appeared in earlier drafts were explanatory pseudocode, not verified KV STUDIO mnemonics. Build the final program from the target-aware instruction list and validate it on the actual drive and mechanics.
Communication Protocols and Networking
EtherCAT Industrial Ethernet
EtherCAT can provide deterministic cyclic communication, but supported master functions, device count, topology, cycle time, and distributed-clock behavior depend on the selected KV CPU or unit and the complete network. Verify those limits in the target manual and measure the loaded system.
KV-7500 EtherCAT Configuration:
- Add EtherCAT devices in KV STUDIO network configuration
- Auto-scan network to detect connected servo drives and I/O
- Configure process data mapping between PLC memory and EtherCAT devices
- Set cycle time from the drive, I/O, axis, and controller requirements
- Enable distributed clocks for synchronized motion
EtherCAT device-access concept (pseudocode):
Rung 1: Write Servo Command Position
|--[MOVE DM500 ECAT_SERVO1.TARGET_POS]--|

Rung 2: Read Servo Actual Position
|--[MOVE ECAT_SERVO1.ACTUAL_POS DM510]--|

Rung 3: Control Servo Enable
|--[R_ENABLE]--[SET ECAT_SERVO1.ENABLE]--|
Modbus TCP and RTU Communication
Modbus RTU and Modbus TCP are common integration options, but support and client/server roles are model- and unit-specific. Confirm the selected port, role, function codes, word order, timeout, retry, and exception handling.
Modbus TCP client concept (pseudocode):
Rung 1: Read Holding Registers from Remote Device
|--[MODBUSTCP_READ DEVICE1 40001 10 DM100]--|
|                                             |
| Read 10 registers starting at 40001 into DM100-DM109 |

Rung 2: Write Multiple Registers to Remote Device
|--[MODBUSTCP_WRITE DEVICE1 40100 5 DM200]--|
|                                             |
| Write DM200-DM204 to registers 40100-40104 |
Modbus RTU Serial Communication:
Rung 1: Configure Serial Port for Modbus RTU
|--[FIRST_SCAN]--[MODBUS_RTU_CFG PORT1 9600 EVEN 1]--|
|                                                      |
| Configure Port 1: 9600 baud, Even parity, 1 stop bit |

Rung 2: Read Input Registers from Slave Device
|--[MODBUS_RTU_READ PORT1 SLAVE_ID=5 30001 8 DM300]--|
VFD Speed Control via Modbus:
Rung 1: Convert Speed Setpoint to VFD Format
|--[MOVE DM400 R0]--|              // Speed in RPM (0-1800)
|--[MUL R0 10 R1]--|                // Convert to 0.1 RPM resolution
|--[DIV R1 1800 R2]--|              // Calculate percentage
|--[MUL R2 10000 DM401]--|          // VFD format: 0-10000 = 0-100%

Rung 2: Write Speed Command to VFD
|--[MODBUS_WRITE PORT1 SLAVE_ID=1 40001 1 DM401]--|

Rung 3: Read Actual Speed from VFD
|--[MODBUS_READ PORT1 SLAVE_ID=1 30001 1 DM410]--|
EtherNet/IP Communication
KV-X's official page confirms EtherNet/IP support. For other KV families, confirm the required adapter/scanner role and connection limits for the exact CPU or communication unit.
Explicit-messaging concept (pseudocode):
Rung 1: Read Data from EtherNet/IP Device
|--[EIP_READ DEVICE_IP CLASS INSTANCE ATTRIBUTE DM500]--|

Rung 2: Write Data to EtherNet/IP Device
|--[EIP_WRITE DEVICE_IP CLASS INSTANCE ATTRIBUTE DM600]--|
Direct PLC Link (Keyence Proprietary)
If the selected controller supports a vendor-specific PLC-link function, document its compatibility, exchanged range, update behavior, fault detection, and recovery using the current manual.
Link Configuration:
Rung 1: Configure PLC Link Partner
|--[FIRST_SCAN]--[PLCLINK_CFG PARTNER1 IP_ADDR 192.168.1.100]--|

Rung 2: Automatic Data Exchange (Configured in Link Tables)
| Link tables automatically synchronize DM1000-DM1099 with Partner PLC |

Rung 3: Manual Data Send
|--[TRIGGER]--[PLCLINK_SEND PARTNER1 DM500 50]--|
|                                                 |
| Send DM500-DM549 to Partner PLC on demand      |
Barcode Reader and RFID Integration
Barcode and RFID devices can be integrated over supported serial or industrial-Ethernet interfaces. Select the actual reader first, then use its current communication manual and sample program.
Barcode Scanner Integration:
Rung 1: Configure Barcode Scanner on Serial Port
|--[FIRST_SCAN]--[BARCODE_CFG PORT2 SR1000]--|
|                                             |
| Configure for Keyence SR-1000 scanner      |

Rung 2: Trigger Barcode Read
|--[PART_PRESENT]--[BARCODE_TRIGGER PORT2]--|

Rung 3: Retrieve Barcode Data
|--[BARCODE_COMPLETE PORT2]--[BARCODE_DATA PORT2 DM700 20]--|
|                                                             |
| Store barcode string in DM700-DM719 (ASCII)                |

Rung 4: Process Barcode for Product Identification
|--[COMPARE DM700 "PROD_A" R_PRODUCT_A]--|
|--[COMPARE DM700 "PROD_B" R_PRODUCT_B]--|
RFID Reader Application:
Rung 1: Read RFID Tag UID
|--[RFID_READ PORT3 UID DM800]--|     // Read unique ID to DM800

Rung 2: Write Data to RFID Tag
|--[RFID_WRITE PORT3 DATA DM900 16]--|  // Write 16 words to tag memory
For detailed protocol implementation guides, reference:
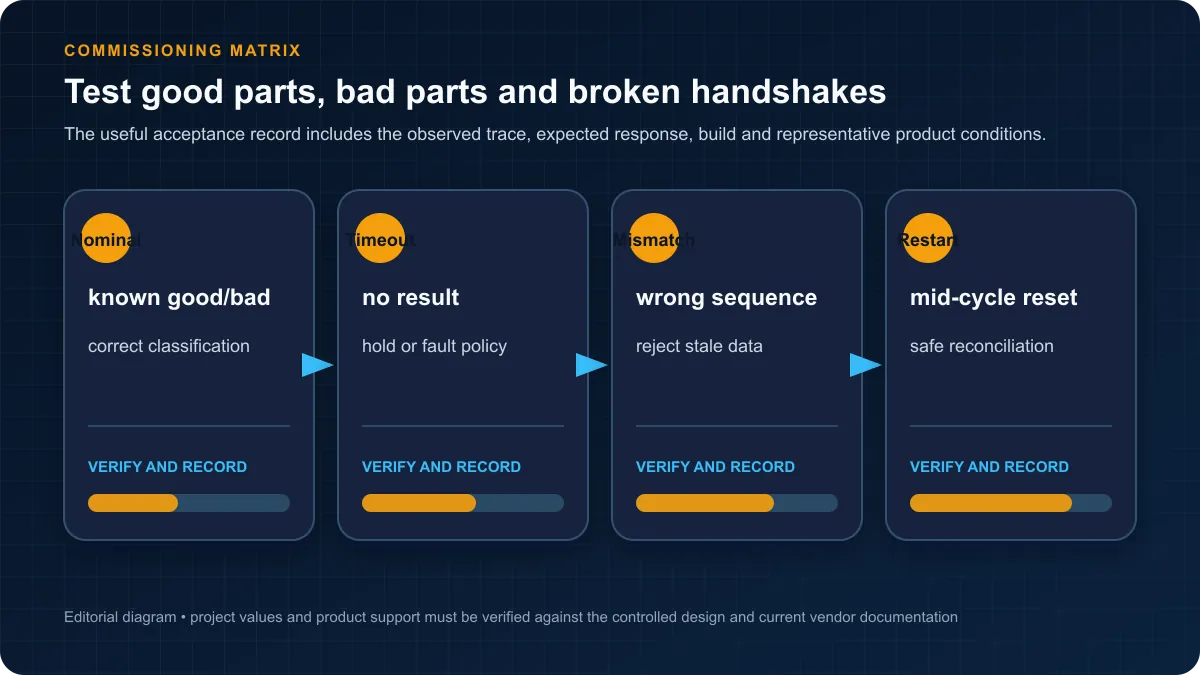
Best Practices for Keyence PLC Programming
Program Organization and Structure
Modular Programming for Maintainability:
Organize KV STUDIO projects into logical functional blocks using subroutines and program segments:
Main Program Structure:
- Initialize hardware and communication (execute once on startup)
- Monitoring of safety-system status; the safety function itself belongs in a verified safety architecture
- Production sequence state machine
- Call specialized subroutines for complex functions
- Data logging and communications handling
Subroutine Organization:
- SBR_1: Vision inspection trigger and result handling
- SBR_2: Motion control positioning sequences
- SBR_3: Recipe management and product changeover
- SBR_4: Communication with external devices
- SBR_5: Alarm handling and operator notifications
Use Descriptive Addresses: Rather than cryptic device addresses like R100, R101, R102, utilize KV STUDIO's global label feature:
R100 → SYSTEM_RUNNING
R101 → EMERGENCY_STOP
R102 → VISION_PASS
DM100 → PRODUCTION_COUNT
DM101 → REJECT_COUNT
T0 → DELAY_CONVEYOR_START
Global labels dramatically improve program readability and reduce troubleshooting time.
Vision System Optimization
Maximize Inspection Speed and Reliability:
Lighting Consistency: Vision performance depends critically on consistent, uniform lighting. Use regulated LED lighting systems immune to voltage fluctuations, shield cameras from ambient light interference, and establish lighting verification procedures during maintenance.
Minimize Region of Interest: Configure inspections to analyze only the necessary image area. A smaller region can reduce processing work, but the actual improvement depends on the tool and hardware and should be benchmarked.
Optimize Inspection Sequence: Order vision algorithm steps from fastest rejection criteria to slowest. If simple presence detection fails, skip expensive pattern matching algorithms.
Calibration Procedures: Establish regular calibration procedures using master parts with known-good characteristics, document acceptable lighting and exposure settings, and create calibration verification programs validating system accuracy.
High-Speed I/O Configuration
Maximize Response Time:
Use Interrupt Programs: Where the target supports input interrupts, use them only after confirming the event rate, execution-time budget, priority, and data-sharing behavior. The following is pseudocode:
|--[INT_CFG X0 RISING INT_PROG_1]--|     // Configure X0 rising edge interrupt
|                                        |
| Interrupt program INT_PROG_1 executes immediately on X0 transition |
Minimize Scan Time:
- Eliminate unnecessary math operations in main scan
- Move complex calculations to subroutines called only when needed
- Use 16-bit operations instead of 32-bit where applicable
- Disable unused communication protocols
I/O Update Optimization: Configure immediate I/O refresh for time-critical inputs and outputs:
|--[REFRESH_IN X0]--|      // Update input X0 immediately (not waiting for scan)
|--[REFRESH_OUT Y0]--|     // Update output Y0 immediately
Documentation Standards
Professional Program Documentation:
Header Comments: Every program should include comprehensive header describing purpose, author, revision history, and I/O assignments:
(*=================================================================
  Program: PCB Inspection System
  Application: Electronics Quality Control Line #3
  Author: Engineering Department
  Created: 2025-12-11
  Revision: 1.2

  Hardware:
  - KV-8000 PLC (Base + 2x Expansion)
  - Vision system and camera catalog numbers
  - Servo conveyor positioning system

  Communication:
  - Modbus TCP to SCADA (192.168.1.100)
  - EtherNet/IP to Cognex barcode reader

  Safety:
  - Emergency stop chain on X10
  - Light curtain on X11-X12
=================================================================*)
Inline Comments: Document complex ladder logic sections explaining intent:
|--[Logic conditions]--|
|                       |
| Calculate reject delay based on conveyor speed and reject station distance |
| Delay_ms = (Distance_mm ÷ Speed_mm/s) × 1000 |
Change Log: Maintain revision history within program:
(* Revision History:
   v1.0 - 2025-11-01 - Initial release
   v1.1 - 2025-11-15 - Added secondary camera inspection
   v1.2 - 2025-12-11 - Optimized vision processing (650ms → 480ms)
*)
Leveraging Keyence Technical Support
Keyence publishes manuals, software, sample-program, support, and contact resources. Availability, response times, training, on-site assistance, and cost vary by region and account, so confirm them with the local office.
Support Resources:
- Technical support: Confirm local hours and escalation path
- Application assistance: Confirm scope, scheduling, and cost
- Training programs: Confirm current formats and availability
- Sample Programs: Extensive library of application-specific program examples
- Online Documentation: Comprehensive manuals, tutorials, and video guides
Maximizing Support Value:
When contacting Keyence support:
- Have complete system description ready (PLC model, I/O configuration, application)
- Prepare specific questions with relevant program excerpts
- Document observed behavior vs. expected behavior
- Request sample programs for similar applications
- Ask about beta testing new features relevant to your application
Include support and training terms in the quote instead of assigning an assumed monetary value.
Frequently Asked Questions
What makes Keyence PLCs different from other brands?
The current KV-X platform combines PLC engineering, machine-operation recording, industrial communications, and an IEC 61131-3-compliant KV STUDIO environment. Whether that is an advantage depends on the machine's installed base, required networks, safety architecture, team skills, lifecycle policy, local support, and total quoted system.
Is Keyence PLC programming software free?
Keyence offers an official KV-X trial version of KV STUDIO. Its KV-X product page also describes a company site-license policy with free installation and updates within a company. Those are separate statements; confirm the trial restrictions and how the site license applies to your organization, region, contractors, and controller targets.
How does Keyence integrate vision systems with PLCs?
Use a documented handshake between the selected vision system and PLC: trigger, busy, complete, valid, result, measurements, recipe, fault, timeout, and reset. The connection method and configuration software depend on the exact camera, vision controller, PLC, and communication unit. Measure end-to-end latency instead of assuming it.
What is the KV-8000 built-in vision capability?
This page no longer assigns unverified camera counts, processing times, or internal architecture to KV-8000. Use the exact current KV-8000 and vision-system manuals to determine supported products and topology. If you are choosing a new platform, compare those requirements with the current KV-X line rather than relying on a legacy summary.
Are Keyence PLCs expensive?
Compare current quotes for the complete system: controller, I/O, networks, safety, motion, vision, engineering software, training, support, spares, and lifecycle. This guide does not publish price ranges because configurations, discounts, and regions make them unreliable.
What industries commonly use Keyence PLCs?
Electronics Manufacturing: PCB assembly inspection, semiconductor packaging, component placement verification, and solder-joint inspection.
Packaging and Labeling: Label verification, print inspection, package integrity checking, fill-level verification, and barcode reading.
Automotive Components: Precision part inspection, dimensional verification, assembly verification, surface defect detection, component tracking throughout production.
Pharmaceutical Manufacturing: Tablet inspection and counting, label verification for regulatory compliance, blister pack inspection, serialization and track-and-trace systems.
Food and Beverage: Package integrity inspection, fill level verification, label checking, foreign object detection, date code verification.
Medical Device Manufacturing: Component inspection to stringent quality standards, dimensional verification, surface defect detection, traceability systems for regulatory compliance.
Can Keyence PLCs control motion and servos?
Some KV configurations support positioning or networked motion. Required axes, interpolation, cycle time, drive compatibility, and safety functions must be matched to the exact CPU, motion unit, drive, and firmware. Do not infer them from the family name.
How reliable are Keyence PLCs?
Reliability must be assessed from the selected product's current environmental ratings, approvals, warranty, lifecycle status, and the user's operating conditions. This guide does not claim an MTBF, coating, temperature range, shipping time, or field-failure rate without a model-specific primary source.
What communication protocols do Keyence PLCs support?
Industrial Ethernet Protocols:
- EtherCAT (KV-7500): Deterministic real-time communication for motion control and distributed I/O
- Modbus TCP: Universal industrial protocol for SCADA, instruments, and third-party devices
- EtherNet/IP: Allen-Bradley/Rockwell Automation protocol compatibility
- Direct PLC Link: Optimized Keyence-to-Keyence communication
Serial Communication Protocols:
- Modbus RTU: Industry-standard serial protocol for VFDs, instruments, meters
- Custom Protocols: Flexible serial communication for proprietary devices
- ASCII Communication: Simple text-based protocols for barcode readers, printers
Specialty Device Protocols:
- Keyence Sensor Protocol: Optimized communication with Keyence sensors, vision systems, measurement devices
- Barcode Scanner Protocol: Native support for Keyence SR-series scanners
- RFID Protocol: Integration with Keyence RFID readers
Protocol availability and roles vary by CPU and communication unit. Confirm the exact model's supported role, connection count, update behavior, and security requirements.
How do I get started learning Keyence PLC programming?
Step 1: Use the official KV-X trial page Download the current KV STUDIO trial from Keyence, follow its registration and installation instructions, and record the installed build.
Step 2: Use Built-In Simulator Create sample projects without hardware using KV STUDIO's simulator. Practice ladder logic programming, experiment with instructions, and build confidence before hardware investment.
Step 3: Access Keyence Training Resources
- Online Documentation: Comprehensive programming manuals and instruction references
- Video Tutorials: Step-by-step programming demonstrations
- Sample Programs: Application-specific example code
- Technical Application Notes: Detailed implementation guides
Step 4: Select training hardware by compatibility Choose a currently supported controller only after confirming that it matches the installed KV STUDIO build, available power and I/O, and the exercises you plan to run.
Step 5: Leverage Keyence Technical Support Contact Keyence support with the exact model, firmware, software build, unit configuration, and reproducible question. Confirm local availability and any cost.
Step 6: Attend Keyence Training Keyence offers hands-on training courses at facilities nationwide covering PLC programming fundamentals, vision integration, and motion control. Contact local Keyence office for training schedule.
Step 7: Start Simple, Progress Gradually Begin with basic digital I/O control, progress to timers and counters, then advance to analog control, communication protocols, and eventually vision integration as skills develop.
Is Keyence vision integration always better than a separate vision system?
No. Compare the exact architectures using measured cycle time, image-tool requirements, camera options, maintainability, fault recovery, team skills, lifecycle, and complete cost. A tightly coordinated single-vendor system can reduce integration work; a separate vision system can provide different cameras, tools, compute, or vendor flexibility. Test the representative inspection before committing.
Ready to evaluate Keyence PLCs? Start with the official trial and product pages, then validate the target hardware, software entitlement, manuals, and representative machine cycle before purchase.
For additional PLC programming resources:
- Best PLC Programming Software Rankings
- EtherCAT Protocol Tutorial
- Vision Inspection Systems Guide
- Motion Control Fundamentals