Mitsubishi PLC Programming: GX Works3 & FX5U Tutorial
Build and simulate a Mitsubishi FX5U program in GX Works3, with software-to-CPU selection, X/Y addressing, ladder logic, tested states, communications, and migration limits.
Mitsubishi PLC programming uses GX Works3 for the current iQ-R, iQ-F, and FX5/FX5U series, and GX Works2 for supported Q, L, and earlier FX families. Legacy A, QnA and old FX hardware can require GX Developer; regional availability of the old GX Developer-FX package varies. Choosing the right software is the first step—the wrong tool or unsupported point release may not connect to the CPU.
Mitsubishi documents applications in compact machinery, electronics assembly, material handling and high-speed discrete automation. The practical value of learning the platform comes from understanding its engineering workflow and device-addressing conventions—not from an uncited market-share claim.
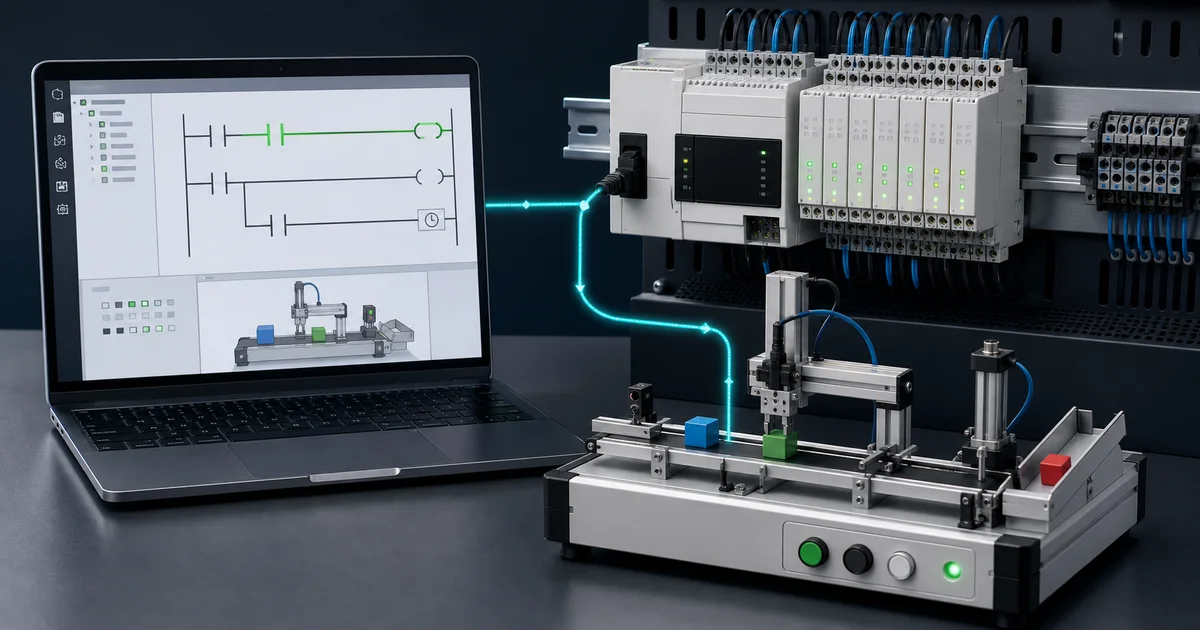
This tutorial concentrates on a reproducible FX5U workflow in GX Works3: select the correct CPU, create a small ladder program, simulate defined input states, and record what still requires hardware testing. It also explains how to verify older FX, Q and L projects without pretending that one instruction, device range or communications option applies to every Mitsubishi CPU.
By the end, you should be able to choose the correct engineering-software family, build the included motor-command example, execute its test matrix, and create a manual-driven checklist for an unfamiliar controller.
Table of Contents
- Mitsubishi PLC Product Lines
- GX Works3 vs GX Works2 vs GX Developer: Which Software for Which PLC
- How to Download and Install GX Works3
- GX Works Programming Software
- Mitsubishi Device Addressing: X/Y Octal vs iQ-R Hex
- Your First Program in GX Works3
- Mitsubishi PLC Simulator: Test Without Hardware
- Ladder Logic Programming on Mitsubishi PLCs
- Structured Text and Function Blocks
- Communication and Networking
- Practical Application Example
- Best Practices
- Troubleshooting Common Issues
- Frequently Asked Questions
GX Works3 vs GX Works2 vs GX Developer: Which Software for Which PLC
A common stumbling block for engineers new to Mitsubishi is opening the wrong software for their hardware. GX Works3, GX Works2, and GX Developer target different hardware generations; projects are not directly interchangeable, although documented conversion paths exist for selected source/target families.
If you are comparing Mitsubishi against other brands, see our Mitsubishi vs Allen-Bradley PLC comparison for a side-by-side look at software ecosystems and total cost.
Software-to-Series Decision Table
| PLC Series / Model | Correct Software | Notes |
|---|---|---|
| iQ-R | GX Works3 | Verify the exact CPU in the current GX Works3 supported-model table |
| iQ-F / FX5U / FX5 | GX Works3 | Native environment for documented new projects |
| Q series | GX Works2 | Confirm the exact Q CPU and installed GX Works2 version |
| L series | GX Works2 | Same generation as Q series |
| FX3U / FX3G / FX3UC | GX Works2 | Legacy compact series; verify exact CPU and lifecycle |
| FX1N / FX2N | GX Works2 or GX Developer | Older models; GX Works2 covers most needs |
| Legacy FX (FX0, FX, FX2C, FX-A) | GX Developer / GX Developer-FX | Legacy package; verify regional availability and the exact model |
| A series / QnA series | GX Developer | Old modular platforms; GX Developer-FX does not cover A/QnA |
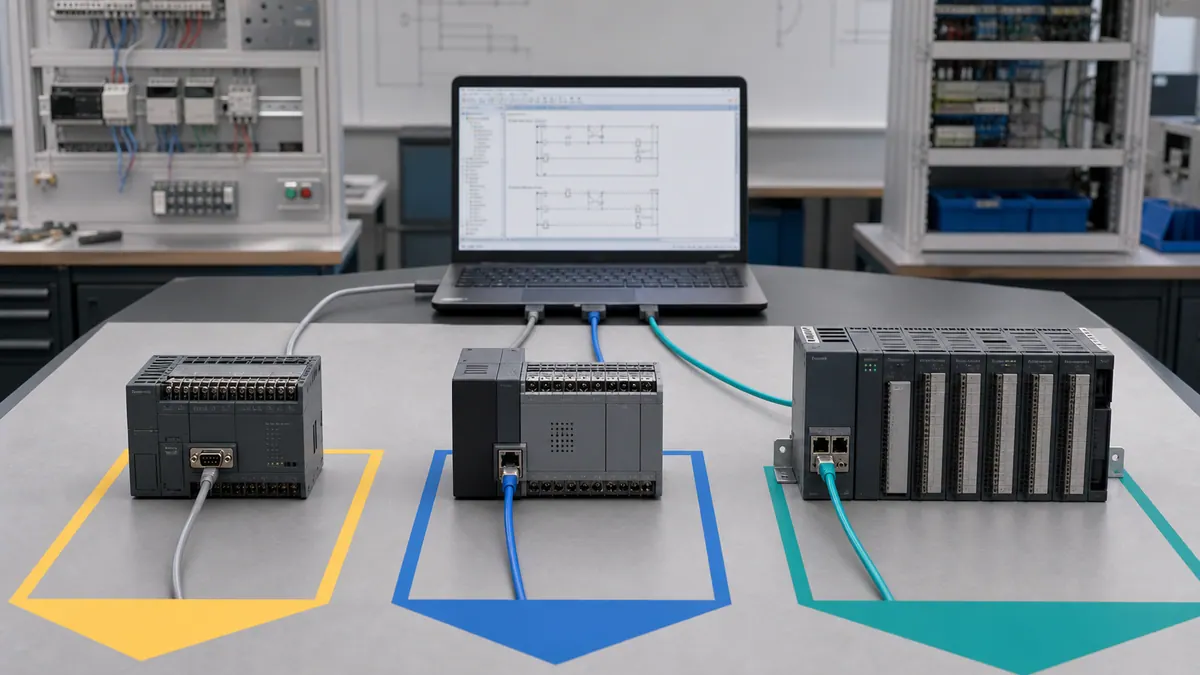
Key rules to remember:
- GX Works3 = iQ-R, iQ-F, FX5/FX5U (new generation)
- GX Works2 = Q, L, FX3 and earlier supported families (previous generation)
- GX Developer = a legacy environment for documented A/QnA/old FX hardware; availability and licensing vary by region
- GX Works3 projects do not open in GX Works2; GX Works3 can open or convert only the GX Works2 project families documented by Mitsubishi
- Migrating from Q series to iQ-R is a documented conversion-and-validation project, not a blind file import
FX5U rule: The FX5U belongs to the iQ-F line; create and maintain FX5U projects in GX Works3. Do not treat the ability to convert selected older GX Works2 projects into a newer module type as proof that GX Works2 is the FX5U engineering environment.
Not sure which hardware you have? For a complete rundown of free and paid options across all brands, see our free PLC programming software guide.
How to Download and Install GX Works3
GX Works3 is a paid, licensed product sold through Mitsubishi Electric authorized distributors. There is no universal full-production free edition of GX Works3; pricing, trial access and entitlements vary by edition and region. For legacy FX hardware, check Mitsubishi's regional portal for the old GX Developer-FX package and confirm the exact supported model before installing it.
Where to Get GX Works3
- Visit the Mitsubishi Electric FA Global site: www.mitsubishielectric.com/fa/worldwide and navigate to your regional FA portal (e.g., www.mitsubishielectric.co.uk/fa for EMEA, us.mitsubishielectric.com/fa for North America).
- Search for "GX Works3" under the Software section, or contact your local Mitsubishi Electric distributor directly.
- Ask the regional Mitsubishi Electric office or authorized distributor to identify the exact orderable package and any optional engineering components required by your hardware.
- Record the supplied license/activation method and entitlement terms from the quote or license document; do not infer them from another region or an older package.
GX Works3 is paid/licensed, varies by edition. Do not rely on third-party download sites — only obtain software from official Mitsubishi channels to avoid corrupted installers or unlicensed copies.
Check Requirements Before Installing
GX Works requirements change with the release and installed MELSOFT components. Before downloading, record:
- the GX Works3 version and build offered in your region;
- the operating-system editions listed in that release's installation instructions;
- required MELSOFT dependencies and available disk space;
- the license type supplied by the distributor; and
- the communication driver required by the exact CPU or adapter.
Use the installation instructions shipped with that release as the authority. A generic web table can become wrong after an operating-system or GX Works update.
Installation Steps
- Run the GX Works3 installer as administrator.
- Follow the on-screen prompts; accept the license agreement.
- Choose installation directory (default is usually fine).
- Apply the license using the method supplied with your edition.
- Install only the Mitsubishi communication drivers required by the CPU or adapter you will use.
- Launch GX Works3 and confirm the installed version and license state.
The Legacy GX Developer-FX Option
If you are working with older FX hardware, some Mitsubishi regional portals have distributed GX Developer-FX for selected legacy models. Treat it as a maintenance tool, not a current-platform shortcut: confirm availability and the model list on the official regional site. It does not make an old project or cable compatible with FX5U, Q or iQ-R hardware.
Mitsubishi Device Addressing: X/Y Octal vs iQ-R Hex
Mitsubishi device addressing trips up engineers who come from Allen-Bradley or Siemens backgrounds. The key difference is that X (input) and Y (output) device numbers are written in octal on FX series, not decimal or hex. Understanding this before you write your first rung will save significant troubleshooting time.
For a full comparison of how Mitsubishi and Allen-Bradley handle I/O addressing and tag databases, see our Mitsubishi vs Allen-Bradley PLC comparison.
The Octal Rule for X and Y Devices
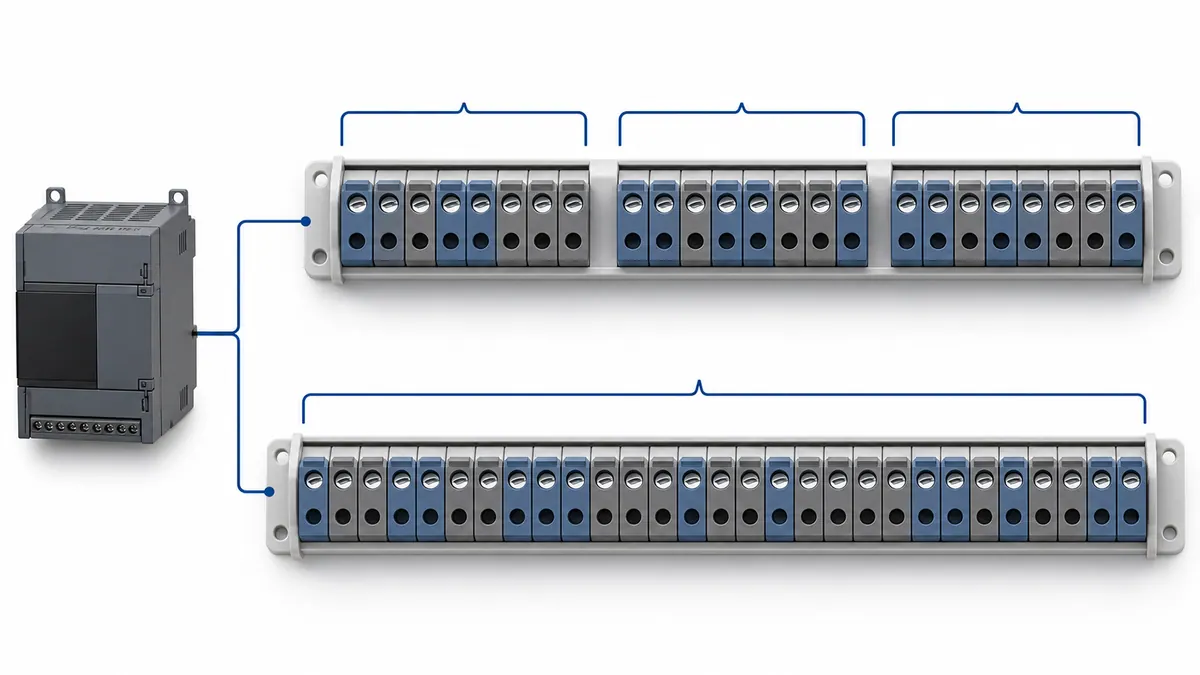
On FX series PLCs (FX3U, FX5U, iQ-F), input and output addresses are octal — meaning the digits 8 and 9 never appear in an X or Y address. After X7 comes X10 (not X8). After X17 comes X20. The sequence runs: X0, X1, X2, X3, X4, X5, X6, X7, X10, X11, X12, X13, X14, X15, X16, X17, X20 ...
Why this matters in practice: after X7 comes X10 in octal notation. Do not infer the physical terminal count, first expansion address or available device range from a family name. Those values depend on the exact CPU, expansion arrangement and parameters. Compare the GX Works3 module configuration with the hardware manual and the panel I/O schedule.
The X8/X9 skip: There are no X8 or X9 devices in FX series hardware. X7 is followed directly by X10. The same applies to Y — Y7 is followed by Y10.
FX Device-Range Verification
The letters identify device classes, but the valid range and behavior are CPU-specific:
| Device class | Typical purpose | Verify before use |
|---|---|---|
| X / Y | Physical input / output devices | Numbering base, installed module assignment and terminal map |
| M | Internal bit devices | Available range, latch allocation and special-device reservations |
| D | Word data devices | Available range, retention settings and special-device reservations |
| T / C | Timers and counters | Instruction form, time base, width and hardware-counter assignment |
In GX Works3, open the parameters for the selected CPU and compare them with that CPU's user manual. If an imported project uses a device outside the target range, treat the conversion message as a design issue—not a warning to dismiss.
iQ-R Series: Hexadecimal X/Y Notation
On iQ-R, X/Y device notation is hexadecimal. X10 therefore represents decimal 16, not decimal 10. The available addresses still depend on CPU parameters, module configuration and assigned refresh ranges. Use GX Works3's module configuration and the exact CPU/module manuals rather than copying an FX device table into an iQ-R project.
Special Relays and Registers
Special relays and registers are not a portable API across Mitsubishi generations. An FX-series RUN flag or clock device can have a different replacement on another CPU. Search the selected CPU's device-assignment manual, record the cited table in the project documentation, and prefer named labels so a later migration exposes the dependency.
Your First Program in GX Works3
This walkthrough creates a simple motor-command rung in an FX5U project, then simulates it without physical hardware. Do not carry the device assignments into iQ-R; create a separate project from that CPU's manual and supported-device table.
Download the seven-state FX5U motor test matrix before opening the simulator. It defines the input combinations and expected outputs used in this example so you can reproduce the result rather than merely copy the rung.
For a real retrofit or training cell, pair it with the Mitsubishi project compatibility record, FX5U commissioning matrix, and Mitsubishi troubleshooting evidence log. The templates deliberately require exact catalog numbers, software versions, manuals, observed values and unresolved hardware tests; a family name alone is not acceptance evidence.
Step 1: Create a New Project
- Launch GX Works3.
- Select Project > New.
- In the New Project dialog:
- Series: MELSEC iQ-F
- Type: select the FX5U CPU documented for your simulator or trainer
- Language: Ladder
- Click OK. GX Works3 creates a project with a default MAIN program block.
Step 2: Write the Motor Start/Stop Rung
In the MAIN program, enter the following ladder logic. It implements a latched motor command with an ordinary process permissive:
// Rung 1 — Motor Start/Stop (latching)
LD   X0          // Start pushbutton (NO contact)
OR   Y0          // Motor command seal-in contact
AND  X1          // NC-wired Stop input is TRUE in the healthy state
AND  X2          // Process permissive must be TRUE
OUT  Y0          // Simulated motor command output

// Rung 2 — Running indicator lamp
LD   Y0          // Motor output energised
OUT  Y4          // Green run lamp
The rung's Boolean behavior is Y0_next = (X0 OR Y0_previous) AND X1 AND X2. That expression matches the CSV: the NC-wired Stop input and process permissive are 1 in the healthy state, and either becoming 0 drops the command.
I/O assignment for this example:
| Address | Description | Wiring |
|---|---|---|
| X0 | Start pushbutton | NO contact to PLC input |
| X1 | Stop pushbutton | NC contact wired normally closed |
| X2 | Process permissive | Normal PLC input used only for the training example |
| Y0 | Motor command | Simulated output; validate the real starter interface separately |
| Y4 | Green run lamp | Output to pilot light |
Add device comments in GX Works3 through the device-comment editor. Use the comments on the ladder and in the relevant monitoring/cross-reference views available in your release.
Safety boundary: X2 is deliberately a process permissive, not an emergency-stop circuit. A real emergency stop must be implemented and validated using the applicable safety architecture, risk assessment and safety-rated hardware; standard PLC logic must not be the only means of removing hazardous motion.
Step 3: Configure Device Comments and Labels
Good practice is to create Global Labels for all I/O before writing logic. In GX Works3:
- Open Global Label in the Navigation window.
- Add label entries:
StartButton→ X0 (BOOL),StopButton→ X1 (BOOL),MotorOutput→ Y0 (BOOL). - Use label names in your ladder code instead of raw addresses for readability.
Step 4: Compile and Check for Errors
Select Convert > Convert (F4). GX Works3 compiles the program and reports any syntax errors in the Output window. A clean compile shows "Compile completed."
Step 5: Launch the Built-In Simulator
See the dedicated simulator section below for the complete workflow.
Mitsubishi PLC Simulator: Test Without Hardware
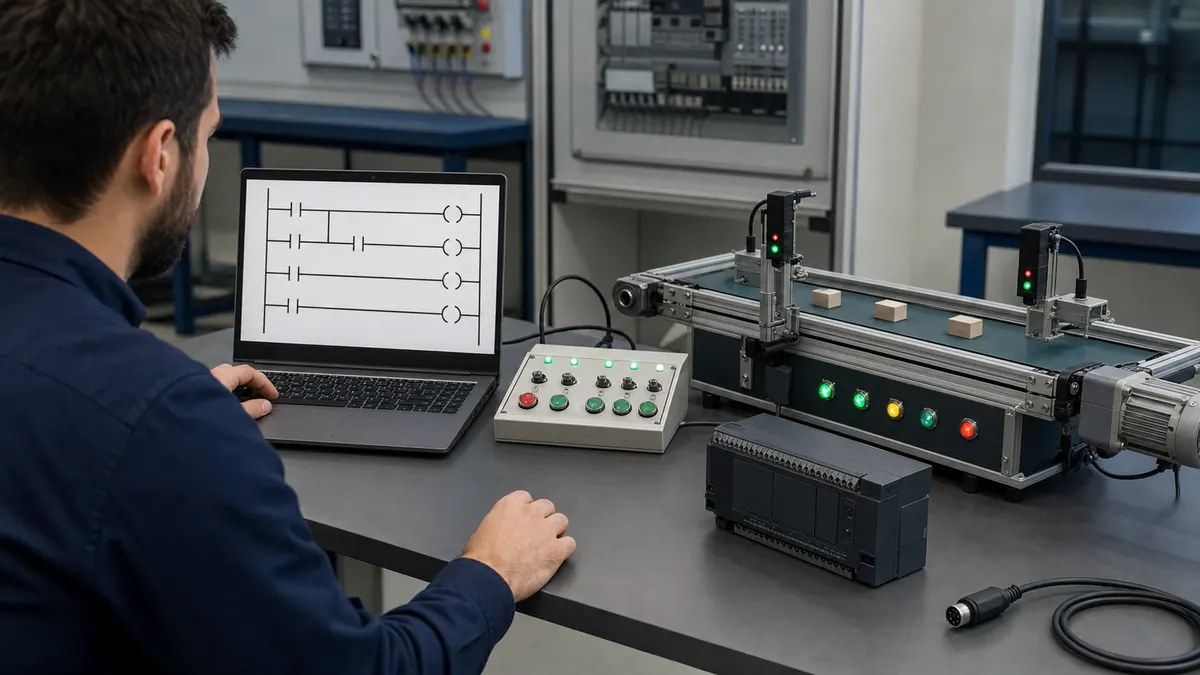
GX Works3 provides simulation for documented CPU/project combinations. Mitsubishi's FX5 support note confirms the simulator workflow for FX5 projects, but module, network and instruction behavior is not universally emulated. Confirm the selected CPU and GX Works3 version in Mitsubishi's current simulator documentation before treating a test as representative.
For an overview of how GX Works3's simulator compares to free simulators from other vendors, see our free PLC programming software guide.
Starting the Simulator
- With your project open and compiled, go to Debug > Start Simulation.
- GX Works3 launches the virtual CPU and downloads your program to it automatically.
- The CPU status indicator in the toolbar switches to RUN (green).
Interacting with the Simulated Program
Monitor mode: Click the Monitor button (or press Ctrl+F3) to see live device values overlaid on the ladder rungs. Energized contacts and coils are highlighted in blue/green.
Forcing devices: Right-click any contact or coil while in monitor mode and select Device Test. The Device Test dialog lets you:
- Set a bit device ON or OFF (X0 = ON to simulate pressing the start button)
- Write a value to a data register (D100 = 1500 to simulate a temperature reading)
- Use the "Forced Input" panel to toggle multiple inputs rapidly during sequence testing
Watching data registers: Open Debug > Watch to create a watch list of specific devices (D registers, timers, counters). Values update in real time each scan.
What the Simulator Can and Cannot Do
| Capability | What to verify |
|---|---|
| Ladder, ST and function-block logic | Compile and execute the exact project in the selected simulated CPU |
| Timers, counters and data devices | Check instruction behavior, time base and retentive settings for that CPU |
| Special relays/registers | Compare simulator behavior with the selected CPU manual |
| Analog and intelligent modules | Determine whether values are emulated, manually injected or unavailable |
| Physical sensors and actuators | Not represented; validate on safely isolated hardware |
| High-speed, motion and network behavior | Validate with the real modules, devices and production timing |
The simulator is the right tool for validating program logic, testing state machine sequences, and catching instruction errors before you reach the shop floor. For timing-critical applications (motion control, high-speed counting) you will still need to validate on real hardware.
Stopping the Simulator
Go to Debug > Stop Simulation. GX Works3 returns to offline edit mode. Your project file is unchanged — the simulator runs a copy in memory.
Mitsubishi PLC Product Lines
Mitsubishi families overlap in capability, so a family-level specification table is a poor purchasing tool. Select from the exact catalog number, manuals, lifecycle status and required option modules.
| Family | Engineering starting point | Project questions |
|---|---|---|
| Older FX / FX3 | GX Works2 or a documented legacy tool | Is the exact CPU supported by the installed software, and are replacement parts still available in the project region? |
| iQ-F / FX5 | GX Works3 | Does the exact CPU provide the required onboard I/O, pulse/motion functions, security options and network interfaces? |
| Q / L | GX Works2 | Which CPU, base, power supply and communication modules are actually fitted, and what is their lifecycle status? |
| iQ-R | GX Works3 | Which CPU/module combination is required for sequence, process, motion, safety and network functions? |
Manual-Driven CPU Selection Checklist
For each candidate catalog number, capture these items in a project worksheet:
- Lifecycle and region: current orderability, support status and regional approvals.
- Software compatibility: minimum/maximum documented GX Works release and supported conversion path.
- Program resources: capacity in the exact execution model you will use, not an uncited family maximum.
- I/O architecture: onboard points, local expansions, remote-I/O network and required power budget.
- Motion/high-speed functions: supported axes, signal type and required option modules.
- Communications: built-in interfaces, licensed functions, option modules and certified device profiles.
- Safety: separate safety controller/module requirements and the applicable safety manual.
- Environment: temperature, vibration, enclosure and hazardous-location approvals.
- Spares: CPU, base, power supply, batteries and communication adapters.
- Acceptance evidence: compile result, hardware configuration export and witnessed test record.
This process retains useful detail without transferring specifications from one CPU variant to another.
GX Works Programming Software
Mitsubishi uses different engineering environments across controller generations. GX Works2 covers documented Q, L and older FX CPUs; GX Works3 covers documented iQ-R and iQ-F CPUs. Check the exact supported-model table rather than extrapolating from the family name.
GX Works2: Programming FX and Q Series
Software Overview and Installation
GX Works2 is the mature programming environment for supported Q, L, FX3 and earlier controller families. It provides integrated simulation, debugging tools and device monitoring, but it should not be presented as the native FX5U environment.
Download GX Works2 only from Mitsubishi's regional FA portal or supplied installation media. Before installation, check the release-specific operating-system requirements, license method and supported-CPU table.
Creating a New Project in GX Works2
Launch GX Works2 and follow these steps to create your first Mitsubishi PLC project:
- Select "Project" > "New" from the main menu
- Choose the documented PLC series (for example, a supported Q or FX3 CPU—not FX5U)
- Select specific CPU model from device list
- Specify project name and save location
- Configure project properties including program language and device comment format
Hardware Configuration in GX Works2
Configure PLC hardware and I/O modules through the "Connection Destination" settings:
- Open "Online" > "Connection Destination" from menu
- Select communication interface (USB, Ethernet, serial)
- Configure IP address for Ethernet connections
- Test connection to verify PLC communication
- Read PLC type to auto-configure hardware settings
For module configuration, navigate to "Parameter" > "I/O Assignment" and configure installed I/O modules, special function modules, and communication modules according to actual hardware installation.
Parameter Settings and Device Configuration
Critical parameter settings include:
PLC Parameter Settings:
- Scan mode and watchdog setting documented for the selected CPU
- Memory capacity allocation
- Battery alarm settings
- RUN/STOP switch settings
Network Parameters:
- IP address and subnet mask
- Device name for network identification
- Open Settings for port configuration
- Ethernet communication protocol settings
GX Works3: Programming iQ-R and iQ-F Series
Modern Development Environment
GX Works3 is the engineering platform for documented iQ-R and iQ-F controllers. Available editors, debuggers, libraries, motion tools and multi-CPU features depend on the selected hardware and installed packages.
Verify these GX Works3 functions per project:
- online-change support and restrictions for the selected CPU;
- simulator support for the instructions and modules in use;
- label, library and function-block compatibility after conversion;
- required motion or safety engineering packages; and
- connection methods supported by the CPU and installed driver.
Project Structure in GX Works3
GX Works3 organizes projects hierarchically supporting complex multi-CPU systems:
- System Configuration: Hardware modules, network settings, parameter configuration
- Programs: Ladder logic, structured text, function blocks organized by program blocks
- Global Labels: Shared variables accessible across program blocks
- Libraries: Reusable function blocks and programs
- Device Comments: Documentation and I/O descriptions
Simulation boundary
Use the simulator to exercise logic paths and documented CPU behavior. Do not claim that it proves physical I/O timing, a network's determinism, a safety response or a motion system's stopping performance. Those require the real configured hardware and an acceptance test.
Multi-CPU Programming Support
Some iQ-R configurations use multiple CPUs. Build only combinations listed in the current system-configuration manuals, then document CPU ownership of each device, inter-CPU refresh mapping, startup sequence and fault response.
Ladder Logic Programming Interface
Both GX Works2 and GX Works3 provide comprehensive ladder logic editors with features including:
Intelligent Input Assistance:
- Auto-complete for device names and instructions
- Real-time syntax checking and error detection
- Graphical instruction selection palettes
- Drag-and-drop programming elements
- Context-sensitive help and instruction documentation
Program Organization:
- Main program (MAIN) for sequential execution
- Subroutines (SUB) for modular code organization
- Interrupt programs (INT) for event-driven processing
- Function blocks (FB) for reusable logic components
- Step ladder (SFC) for sequential state machines
Debugging and Monitoring:
- Online monitoring with real-time device values
- Device batch monitoring for multiple variables
- Entry data monitoring for complex instructions
- Sampling trace for high-speed data logging
- Cross-reference for device usage analysis
Live mini-lab
Try it: press START, then STOP
A stop-dominant seal-in rung: START latches the motor output through its own contact, and STOP breaks the circuit.
Watch the output lamp: it stays on after START until you press STOP.
Free to start · runs in your browserOpens plcsimulationsoftware.com — same team
Ladder Logic Programming on Mitsubishi PLCs
Mitsubishi ladder editors use familiar IEC-style concepts alongside manufacturer-specific instructions and device rules. Confirm the instruction form and supported operand types in the selected CPU's programming manual.
Mitsubishi Ladder Logic Instruction Set
Basic Contact and Coil Instructions
| Instruction | Symbol | Function | Example |
|---|---|---|---|
| LD | Normally Open Contact | Load contact, start new logic line | LD X0 |
| LDI | Normally Closed Contact | Load inverted contact | LDI X1 |
| AND | AND Contact | Serial connection | AND X2 |
| ANI | AND NOT Contact | Serial inverted connection | ANI X3 |
| OR | OR Contact | Parallel connection | OR X4 |
| ORI | OR NOT Contact | Parallel inverted connection | ORI X5 |
| OUT | Output Coil | Energize output or internal relay | OUT Y0 |
| SET/RST | Set/Reset Coil | Latch and unlatch outputs | SET M0, RST M0 |
Application Instructions
Mitsubishi PLCs provide extensive application instruction library:
Data Transfer Instructions:
- MOV - Move word data between devices
- DMOV - Move double-word (32-bit) data
- BMOV - Block move for array transfers
- FMOV - Fill move, copy value to multiple destinations
- XCH - Exchange data between two devices
Arithmetic Instructions:
- ADD/SUB - Addition and subtraction (16-bit)
- DADD/DSUB - Double-word arithmetic (32-bit)
- MUL/DIV - Multiplication and division
- DMUL/DDIV - Double-word multiplication and division
- INC/DEC - Increment and decrement values
Comparison Instructions:
- CMP - Compare two values (equal, greater, less)
- DCMP - Double-word comparison
- ZCP - Zone comparison (value within range)
- DZCP - Double-word zone comparison
Timer and Counter Instructions
Timer syntax, available time bases, retentive behavior and high-speed counter assignment differ by CPU and parameter set. Use the instruction-selection dialog for the selected project and open its built-in help before choosing a device number.
A safe verification pattern is:
- choose a timer/counter instruction documented for the selected CPU;
- record its time base, preset units, width and retention behavior;
- test one count below, exactly at and one count above the preset;
- test reset, power-cycle and mode-change behavior; and
- repeat the timing or pulse test on hardware when scan time or input filtering matters.
Do not copy an FX3 high-speed device number or time base into an FX5/iQ-R project. Hardware counters also require the documented terminal assignment and parameters; forcing an ordinary simulator bit does not validate pulse capture.
Use the Mitsubishi PLC counter guide for the complete FX3/FX5 ordinary-versus-high-speed selection, scan trace, reset, rollover, migration and acceptance-test workflow.
Device Addressing System
For the detailed explanation of octal X/Y addressing and the FX vs iQ-R differences, see the dedicated Mitsubishi Device Addressing section earlier in this guide. The quick-reference summary is below.
Input Devices (X): Physical input devices. Octal on FX/iQ-F (X0–X7, X10–X17 ... X8 and X9 do not exist); hexadecimal on iQ-R. Verify the valid range and module assignment.
Output Devices (Y): Physical output terminals. Same octal/hex convention as X devices.
Internal relays and data registers (M/D): ranges, latch allocation and special-device meanings are model-specific. Use labels for application data and cite the exact CPU manual when special devices are unavoidable.
Timers and counters (T/C): select them from the instruction help for the configured CPU. Document preset units, reset behavior, retention and any parameter-mapped high-speed input.
Extend the First Program Safely
After the supplied start/stop example passes its seven-state CSV test matrix, extend it one behavior at a time:
- replace raw X/Y references with labels linked to the approved I/O list;
- add a simulated process permissive and verify loss-of-permissive behavior;
- add a timer selected from the FX5U instruction help and record its actual preset units;
- add a production count that increments only on a defined completed-cycle edge;
- test power-up, STOP-to-RUN and simulated communication-loss states; and
- document every condition that still requires physical hardware.
Do not represent this ordinary PLC logic as an emergency-stop or safety function. Hazardous-energy removal, safe restart and protective-device diagnostics must be designed and validated in the machine's safety-related control system.
Structured Text and Function Blocks
Supported Mitsubishi CPUs expose structured programming options in GX Works3. Available languages, data types and program-unit features depend on the selected CPU.
Structured Text Programming in GX Works3
ST Language Overview
Structured Text (ST) provides high-level text-based programming similar to Pascal or C languages, enabling efficient implementation of complex control algorithms, mathematical calculations, and data processing that would be cumbersome in ladder logic format.
Basic ST shape: The declarations and logic below are illustrative. Create them through the GX Works3 editor for the selected CPU, compile them, and define the engineering-unit scaling in the project.
// Variable declarations
VAR
    TempSetpoint : INT := 750;      // Temperature setpoint (0.1°C)
    TempActual : INT;                // Current temperature
    HeaterOutput : BOOL := FALSE;    // Heater control
    AlarmHigh : BOOL := FALSE;       // High temperature alarm
END_VAR

// Control logic
IF TempActual < TempSetpoint THEN
    HeaterOutput := TRUE;
ELSIF TempActual > (TempSetpoint + 50) THEN  // 5°C hysteresis
    HeaterOutput := FALSE;
END_IF;

// Alarm checking
IF TempActual > 850 THEN  // 85°C alarm threshold
    AlarmHigh := TRUE;
ELSE
    AlarmHigh := FALSE;
END_IF;
Run Structured Text in the simulator
ST Advantages for Specific Applications:
- Complex mathematical formulas expressed naturally
- Array and loop processing simplified
- Recipe management and data handling
- String manipulation for communications
- Algorithm development and testing
Creating Function Blocks for Reusable Code
Function Block Concept
Function blocks encapsulate control logic with defined inputs, outputs, and internal variables, creating reusable components that simplify program development and maintenance. Well-designed function blocks enable library development for standardized control functions used across multiple projects.
Example: Testable Hysteresis Function Block
// Illustrative IEC-style ST. Create the declarations in the
// GX Works3 editor for your selected CPU, then compile and test.
FUNCTION_BLOCK FB_HeatDemand

VAR_INPUT
    Enable : BOOL;
    Setpoint : INT;       // Engineering units defined by the project
    ProcessValue : INT;
    Deadband : INT;
END_VAR

VAR_OUTPUT
    HeatDemand : BOOL;
END_VAR

IF NOT Enable THEN
    HeatDemand := FALSE;
ELSIF ProcessValue <= (Setpoint - Deadband) THEN
    HeatDemand := TRUE;
ELSIF ProcessValue >= (Setpoint + Deadband) THEN
    HeatDemand := FALSE;
ELSE
    // Retain the prior demand state inside the deadband.
    HeatDemand := HeatDemand;
END_IF;

END_FUNCTION_BLOCK
Run Structured Text in the simulator
Minimum tests before reuse:
- disabled state forces the demand off;
- process value below the lower boundary turns demand on;
- value inside the band retains the prior state;
- value above the upper boundary turns demand off; and
- a negative deadband is rejected by the calling program or configuration.
This is ordinary process-control logic, not a burner-management or temperature-safety function. Use approved protective devices and a separately validated safety design where overheating can create a hazard.
Data Structures and User-Defined Types
Creating Structured Data Types
The following is an illustrative shape rather than a guaranteed paste-and-compile declaration. GX Works3 declaration syntax and supported string/array limits depend on the selected CPU and editor context.
// Recipe data structure
TYPE Recipe
    STRUCT
        RecipeName : STRING[20];
        Temperature : INT;
        Pressure : INT;
        MixTime : INT;
        CureTime : INT;
        IngredientA : REAL;
        IngredientB : REAL;
        IngredientC : REAL;
    END_STRUCT;
END_TYPE

// Array of recipes
VAR
    Recipes : ARRAY[1..10] OF Recipe;
    ActiveRecipe : INT := 1;
END_VAR

// Access recipe data
Setpoint := Recipes[ActiveRecipe].Temperature;
MixTimer := Recipes[ActiveRecipe].MixTime;
Run Structured Text in the simulator
Communication and Networking
Mitsubishi network support is determined by the exact CPU, firmware, option module and engineering-software release. A protocol appearing elsewhere in the product family does not mean it is built into every CPU.
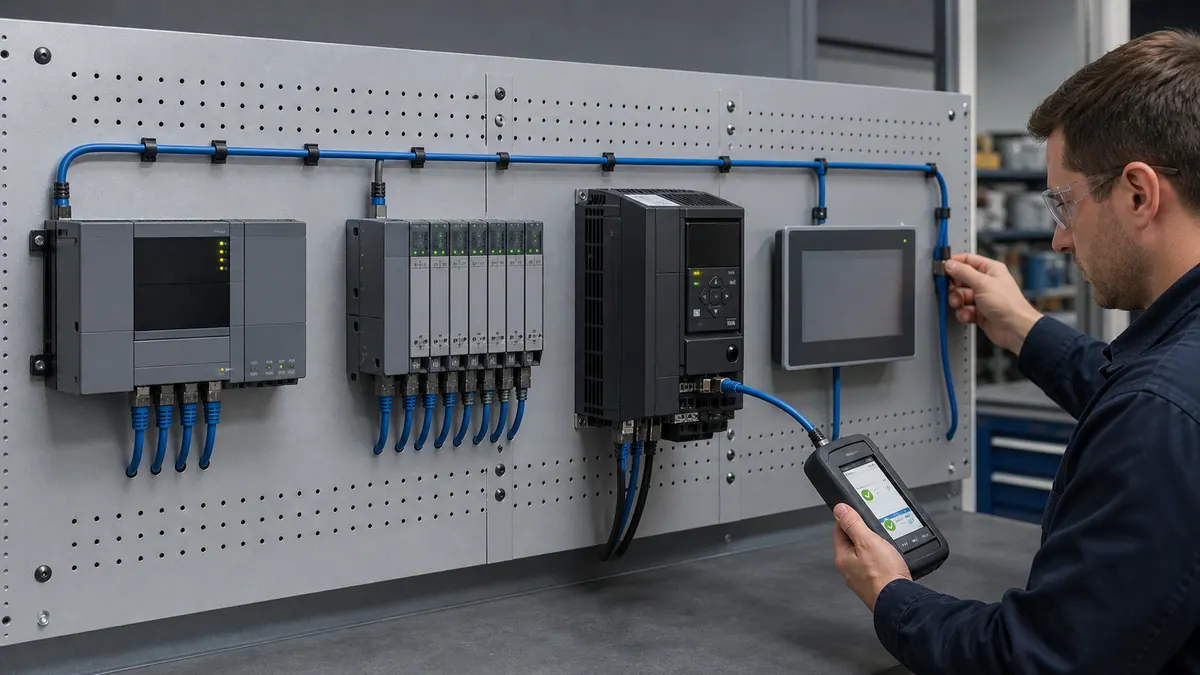
CC-Link for Distributed I/O
CC-Link Protocol Overview
CC-Link (Control & Communication Link) is Mitsubishi's industrial-network family. It includes classic CC-Link fieldbus, CC-Link IE Field for industrial Ethernet applications, and CC-Link IE TSN for time-sensitive networking use cases.
Use the CLPA's current network specifications, certified-product search and the manuals for the exact devices. A conformance record supports protocol compatibility; it does not replace the project's topology, timing or failure testing.
Classic CC-Link verification workflow:
- Identify the exact master module and obtain its current user manual.
- Confirm each remote device's CC-Link version and certified profile.
- Design speed, cable, topology, termination, station count and occupied stations from those manuals.
- Map cyclic data and diagnostics in a reviewed I/O exchange sheet.
- Measure refresh behavior and fault recovery on the assembled network.
CC-Link IE Field for High-Speed Networks
CC-Link IE Field project check
CC-Link IE Field and CC-Link IE TSN are distinct network technologies with different compatible products, media and engineering rules. Choose the exact master/local module and certified partner devices first; then calculate cyclic performance from the configured data size and station layout using the relevant manuals.
Configuration in GX Works3:
- Add CC-Link IE Field network to system configuration
- Configure the documented master/local module
- Add slave devices from device library
- Assign the addresses and station settings required by that network
- Configure cyclic data areas for each slave
- Set the documented cyclic and transient communication parameters
- Download configuration and monitor network status
Record the resulting network-cycle estimate, cable/topology limits, supported station count and recovery behavior for the actual configuration. Do not use a family maximum as a promised project cycle time.
EtherNet/IP Support
Selected Mitsubishi CPUs and communication modules support EtherNet/IP roles. Confirm scanner/adapter support, connection limits, Electronic Data Sheet requirements and firmware compatibility for the exact catalog numbers at both ends.
EtherNet/IP Configuration:
- select a CPU/module whose manual explicitly supports the required role
- configure adapter/scanner relationships
- Define tag-based data exchange
- Set up I/O assembly objects
- Configure explicit messaging for non-cyclic data
Modbus TCP/RTU Integration
Modbus Communication Setup
Modbus TCP and Modbus RTU are available on documented Mitsubishi CPU/module combinations. Implementation can use predefined protocol support, dedicated instructions or an option module; the exact method and instruction names are model-specific.
Before programming, build a register contract with device address base, function code, data type, byte/word order, scaling, timeout and safe stale-data behavior. Test it against the actual third-party device. This avoids publishing plausible-looking instruction syntax that may not compile for the selected CPU.
Industrial IoT and Cloud Connectivity
MQTT and upstream data
Do not assume native MQTT support from the Mitsubishi brand or GX Works3 alone. Verify whether the selected CPU, module, GOT/edge product or external gateway provides the client, TLS version, certificate handling, buffering and store-and-forward behavior the project requires. Keep control and safety independent of cloud availability.
Practical Application Example
Multi-Station Line Design Worksheet
This example is architecture pseudocode for decomposing a multi-station line. It is not a downloadable GX Works3 project and has not been compiled against a specific CPU, motion module or device library. Replace every placeholder with the instruction/function block documented for the purchased hardware.
System Architecture:
Hardware roles to resolve:
- sequence CPU sized from the actual program and I/O architecture;
- motion CPU/module selected from the required axis and safety functions;
- a documented CC-Link IE master/local interface;
- certified remote I/O stations and a calculated network layout;
- servo drives matched to motors, mechanics and stopping requirements;
- an HMI sized from the approved screen and alarm specification; and
- a vision interface with a documented result/status handshake.
Station Breakdown:
- Loading Station: Part feeding and orientation verification
- Assembly Station 1: Component insertion with force monitoring
- Assembly Station 2: Fastening and torque verification
- Inspection Station: Vision-based quality inspection
- Unloading Station: Part removal and sorting
Program Architecture (pseudocode):
// Main Program Structure
PROGRAM Main
VAR
    SystemState : INT := 0;      // 0=Stop, 1=Auto, 2=Manual
    CurrentStation : INT := 1;    // Active station
    PartPresent : ARRAY[1..5] OF BOOL; // Example station count only
    StationReady : ARRAY[1..5] OF BOOL;
END_VAR

// Station sequence control
CASE SystemState OF
    0:  // Stop state
        AllStationsStop();

    1:  // Automatic operation
        LoadingStationControl();
        AssemblyStation1Control();
        AssemblyStation2Control();
        InspectionStationControl();
        UnloadingStationControl();

    2:  // Manual operation
        ManualModeControl();
END_CASE;

// Production data logging
ProductionDataLog();
HMI_Communication();
END_PROGRAM

// Loading Station Function Block
FUNCTION_BLOCK FB_LoadingStation
VAR_INPUT
    Enable : BOOL;
    PartRequest : BOOL;
END_VAR

VAR_OUTPUT
    PartReady : BOOL;
    LoadComplete : BOOL;
    StationFault : BOOL;
END_VAR

VAR
    Step : INT := 0;
    FeederTimer : TON;
    VerifyTimer : TON;
END_VAR

// Station state machine
CASE Step OF
    0:  // Wait for part request
        IF Enable AND PartRequest THEN
            Step := 10;
        END_IF;

    10: // Activate feeder
        FeederActuate := TRUE;
        FeederTimer(IN := TRUE, PT := T#2s); // Placeholder timing requirement
        IF FeederTimer.Q THEN
            Step := 20;
            FeederTimer(IN := FALSE);
        END_IF;

    20: // Verify part presence
        VerifyTimer(IN := TRUE, PT := T#500ms); // Placeholder timing requirement
        IF PartSensor AND VerifyTimer.Q THEN
            PartReady := TRUE;
            LoadComplete := TRUE;
            Step := 30;
        ELSIF VerifyTimer.Q THEN
            StationFault := TRUE;
            Step := 0;
        END_IF;

    30: // Wait for part pickup
        IF NOT PartSensor THEN
            PartReady := FALSE;
            LoadComplete := FALSE;
            Step := 0;
        END_IF;
END_CASE;
END_FUNCTION_BLOCK

// Motion-control concept only. Use the selected Mitsubishi motion
// library's exact axis type, execute handshake and error-reset rules.
PROGRAM MotionControl
VAR
    PickPosition : LREAL := 150.0;     // Placeholder only; derive from mechanics
    PlacePosition : LREAL := 450.0;    // Placeholder only; derive from mechanics
    TransferVelocity : LREAL := 500.0; // Placeholder only; validate safely
    Axis1 : FB_Axis;                   // Servo axis instance
END_VAR

// Configure servo axis
Axis1.Enable := SystemRunning;
Axis1.Acknowledge := AcknowledgeButton;

// Position commands
IF LoadComplete AND NOT TransferBusy THEN
    // Move to pick position
    MC_MoveAbsolute(
        Axis := Axis1,
        Execute := TRUE,
        Position := PickPosition,
        Velocity := TransferVelocity,
        Acceleration := 2000.0,
        Deceleration := 2000.0
    );
END_IF;

// Track motion status and handle errors
IF Axis1.InPosition THEN
    GripperClose := TRUE;  // Activate gripper
END_IF;

IF Axis1.Error THEN
    AlarmMotionFault := TRUE;
    LogError(Axis1.ErrorID, "Transfer axis fault");
END_IF;
END_PROGRAM

// HMI data exchange via GOT interface
PROGRAM HMI_Communication
VAR
    ProductionCount : DINT;
    CycleTime : TIME;
    QualityRate : REAL;
    AlarmActive : BOOL;
END_VAR

// Update HMI display data
ProductionCount := TotalPartsProduced;
CycleTime := StationCycleTimer.ET;
IF TotalParts > 0 THEN
    QualityRate := REAL(GoodParts) / REAL(TotalParts) * 100.0;
ELSE
    QualityRate := 0.0;
END_IF;

// Recipe selection from HMI
IF HMI_RecipeSelect <> ActiveRecipe THEN
    LoadRecipe(HMI_RecipeSelect);
    ActiveRecipe := HMI_RecipeSelect;
END_IF;

// Alarm acknowledgment
IF HMI_AckButton THEN
    ResetAllAlarms();
END_IF;
END_PROGRAM
Run Structured Text in the simulator
Acceptance evidence to add:
- compile result and conversion warnings for the exact GX Works3 project;
- module configuration and firmware/version record;
- station handshakes for normal, timeout, duplicate and out-of-order events;
- motion permissive, abort, homing and restart tests on safely isolated hardware;
- vision pass/fail/invalid-result and communication-loss tests;
- HMI command ownership, alarm acknowledgement and access-control tests; and
- production-count reconciliation, including zero-count and rejected-part cases.
Best Practices
Professional Mitsubishi PLC programming requires disciplined approach to program organization, documentation, testing, and maintenance ensuring long-term system reliability and supportability.
Program Organization and Structure
Modular Programming Approach
Organize programs into logical functional modules:
- Main Program: High-level sequence control and mode management
- Station Programs: Individual station control logic as subroutines or FBs
- Safety-status interface: read-only status/permission exchange with the separately designed safety-related control system
- Communication Program: Network messaging and data exchange
- Diagnostics Program: System monitoring and error logging
Use Subroutines Effectively:
// Main program calls subroutines for organization
CALL StationControl      // Station sequence control
CALL SafetyStatus       // Monitor validated safety-system status; not the safety function
CALL DataLogging        // Production data logging
CALL HMI_Update         // Operator interface update
Function Block Libraries
Develop Standardized Function Blocks:
Create company-standard function blocks for common operations:
- Motor control with overload protection
- Valve control with position feedback
- Temperature control with PID
- Product tracking and traceability
- Recipe management and storage
- Alarm handling and notification
Library Management:
- Store function blocks in GX Works libraries
- Version control for block updates
- Comprehensive block documentation
- Standardized naming conventions
- Testing and validation procedures
Naming Conventions and Comments
Device Naming Standards:
// Physical I/O descriptive naming
X0 : StartButton_Station1
X1 : StopButton_Station1
X2 : ProcessPermissive
X3 : GuardStatus_FromSafetySystem
Y0 : ConveyorMotor_Station1
Y1 : ClampCylinder_Extend

// Internal relay functional naming
M0 : SystemRunning
M1 : AutoMode
M2 : ManualMode
M10 : Station1_Active
M11 : Station1_Complete
M100 : AlarmMajor
M101 : AlarmMinor

// Data register naming
D0 : ProductionCounter
D10 : CycleTimeMs
D20 : RecipeNumber_Active
D100 : TemperatureSetpoint
D101 : TemperatureActual
Comment Standards:
// Network comment at start of each program section
// ===================================
// STATION 1 - LOADING AND VERIFICATION
// Function: Part feeding and orientation check
// Inputs: X0-X7 (sensors, buttons)
// Outputs: Y0-Y3 (feeder, clamp)
// Author: Engineering Team
// Date: 2025-12-10
// ===================================

// Inline comments for complex logic
LD X10                  // Part present sensor
AND T0                  // Settle timer complete
ANI M20                 // Not already processing
SET M21                 // Start verification sequence

// Document special register usage
// Document parameter-owned high-speed functions in the hardware
// configuration; do not hide an uncited special-device write in logic.
Documentation Standards
Comprehensive System Documentation:
- I/O List: Complete input/output assignments with descriptions
- Network Diagram: Communication architecture and device addresses
- Functional Specification: Detailed operation sequence description
- Device Comments: Inline documentation for all devices
- Program Structure: Flowcharts and sequence diagrams
- Parameter Settings: PLC parameters and special configurations
- Revision History: Change log with dates and descriptions
Export Documentation from GX Works:
- Device comment export to CSV/Excel
- Program printouts with comments
- Hardware configuration reports
- Network topology diagrams
- Parameter documentation
Backup and Version Control
Regular Backup Procedures:
- Project Backup: Complete GX Works project files (.gxw)
- PLC Upload: Periodic PLC program uploads to archive
- Parameter Backup: Save all PLC parameters separately
- Documentation Backup: Archive all related documentation
- Offsite Storage: Maintain backups in separate location
Version Control System:
- Use file version numbering (Project_v1.0, Project_v1.1)
- Maintain change logs documenting modifications
- Archive previous versions before making changes
- Test new versions thoroughly before deployment
- Document validation and approval process
Using Simulation for Testing
GX Works3 Simulation Workflow:
- Develop program logic offline
- Create I/O simulation scenarios
- Test normal operating sequences
- Verify error handling and recovery
- Exercise simulated safety-status inputs; validate the actual safety functions separately
- Performance timing verification
- Document test results and issues
- Refine program based on simulation
Simulation Best Practices:
- Create comprehensive test scenarios
- Include fault conditions and recovery
- Validate all program branches execute
- Test boundary conditions and edge cases
- Verify timer and counter operation
- Check data handling and calculations
Troubleshooting Common Issues
Understanding common Mitsubishi PLC problems and solutions accelerates commissioning and minimizes downtime during system operation.
Connection Problems with GX Works
Issue: Cannot Connect to PLC
Troubleshooting Steps:
- Verify physical connection (USB cable, Ethernet cable)
- Check PLC power and RUN/STOP mode
- Confirm IP address settings match PLC configuration
- Check the approved host-firewall rule and required Mitsubishi ports; do not disable the firewall
- Verify USB driver installation for USB connections
- Test Ethernet connectivity with ping command
- Check PLC network parameter settings
- Try different communication interface (USB vs Ethernet)
Common Solutions:
- USB Connection: Install Mitsubishi USB driver from FA website
- Ethernet Connection: Use an approved engineering IP configuration in the PLC subnet
- Firewall: Ask the system owner to allow only the required application/ports for the engineering connection
- Multiple NICs: Disable unused network adapters that may cause routing conflicts
PLC Error Codes and Diagnostics
Reading the CPU LED Indicators
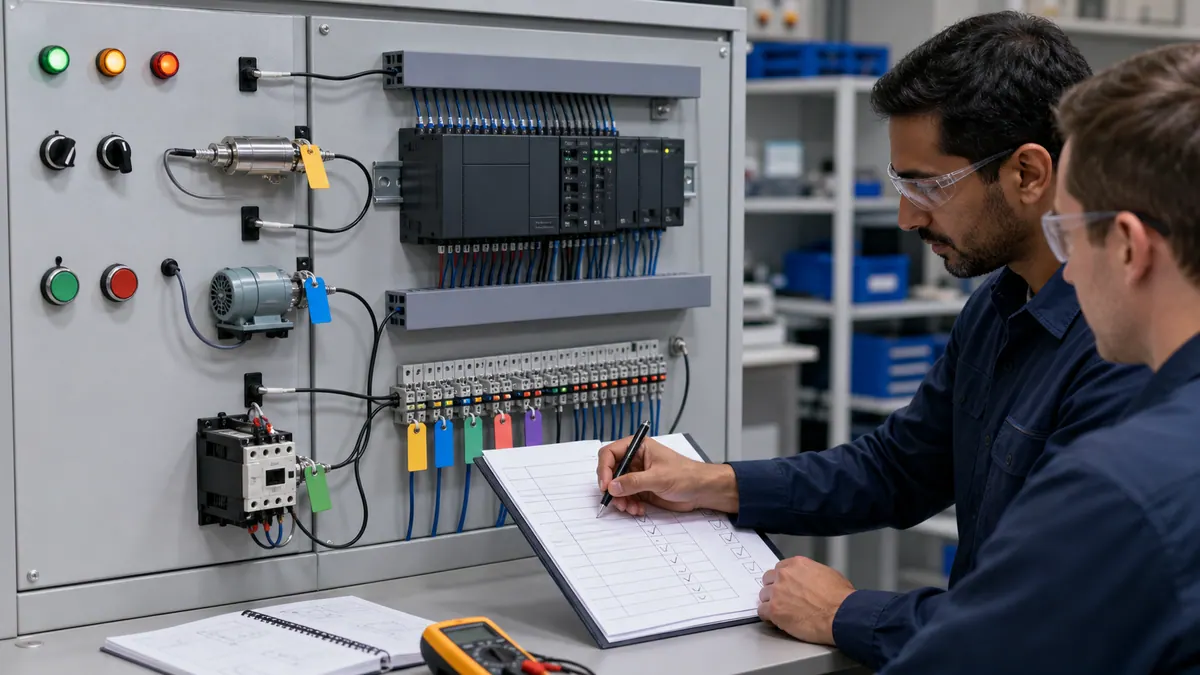
Front-panel LEDs are the fastest first observation, but their labels, colors and flashing patterns differ by CPU. Photograph the complete LED state, record the CPU catalog number and look up that exact pattern in its hardware/user manual. Do not diagnose a Q, FX or iQ-R controller from a generic LED table.
For legacy SC-09 cable context, see our Mitsubishi USB SC-09 cable setup guide. It is not an FX5U cable recommendation; use the exact CPU's connection manual.
Error numbers and recommended actions are product-specific. Read the diagnostic record in GX Works, note the module reporting it, and follow the error-code table in that module's troubleshooting manual. Avoid web lists that collapse similarly formatted codes from different controller families.
Using GX Works3 Event/Error History
GX Works3 exposes diagnostic and history views for supported CPUs/modules. Available records and timestamps depend on the configured hardware.
To access it:
- Connect to the PLC online (or use the simulator).
- Go to Diagnostics > System Monitor in GX Works3.
- Open the error/history view available for the selected module.
- Click any entry to see the error code, error details, and the step number where the program was executing when the error occurred.
- Save the diagnostic details before clearing an error or cycling power.
Special-device diagnostics: legacy projects often expose diagnostic data through special devices, but addresses and meanings depend on the CPU. Verify each address in that CPU's device-assignment manual and label it with the source document/revision. For supported iQ-R modules, start with the GX Works3 module diagnostics and preserve the full event context.
FX3U-specific error history: For older FX3U and FX2N machines still in the field, consult our Mitsubishi FX2N legacy programming guide which covers error codes and diagnostic procedures specific to those platforms.
CC-Link Network Issues
Network Communication Failures
Symptoms:
- Remote stations offline
- Intermittent communication errors
- Data not updating from slaves
Troubleshooting Procedure:
- Check LED indicators on master and slave modules
- Verify cable continuity and shield grounding
- Confirm termination resistors installed correctly
- Check communication speed matches all devices
- Verify station numbers are unique
- Monitor network error counters
- Test with reduced station count
Common Fixes:
- Replace damaged or low-quality cables
- Ensure single-point shield grounding
- Verify termination only at network ends
- Match baud rate on all devices
- Check for electromagnetic interference sources
- Reduce communication speed if errors persist
Parameter Mismatch Errors
Issue: Parameter Mismatch After Download
Cause: Downloaded program parameters don't match PLC hardware configuration
Resolution:
- Upload current PLC program and parameters
- Compare with project parameters in GX Works
- Identify mismatched modules or settings
- Correct hardware configuration in project
- Download complete project including parameters
- Perform PLC reset if required
- Verify operation after download
Prevention:
- Under the approved change procedure, back up and compare the running project before making changes
- Maintain accurate project documentation
- Use parameter compare function in GX Works
- Document all hardware changes
Upload/Download Problems
Failed Program Download
Common Issues:
- PLC in RUN mode (some operations require STOP)
- Write protection enabled on PLC
- Insufficient PLC memory capacity
- USB/Ethernet connection interrupted
Solutions:
// Check PLC mode
1. Check whether the requested write requires STOP for the selected CPU and change type
2. Use "Remote Operation" to change PLC to STOP from GX Works
3. Change write protection only under the site's authorized change procedure

// Memory issues
1. Check program size vs available memory
2. Clear unused program areas
3. Optimize program to reduce size
4. Consider CPU upgrade if consistently over capacity
Continue into the FX family and instruction specialists
Use the Mitsubishi FX family guide for generation selection, the FX3U programming and migration guide for installed-base detail, and the Mitsubishi PLC timer guide for exact timer resources, scan behavior and HVAC sequence tests.
Frequently Asked Questions
What is the difference between GX Works2 and GX Works3?
GX Works2 and GX Works3 are distinct programming platforms for different Mitsubishi PLC generations. A GX Works3 project does not open in GX Works2. GX Works3 can open selected GX Works2-format projects and, for documented CPU families, guide a conversion to a supported newer module type; that is a migration workflow, not bidirectional compatibility.
GX Works2:
- Programs supported Q, L, FX3 and older controller families
- Mature software with broad hardware coverage
- Traditional menu-driven interface
- Simulation availability and scope depend on the selected CPU and installed GX Works2 release; compare the required test functions in the applicable manuals
GX Works3:
- Programs iQ-R, iQ-F, FX5/FX5U — this is the native, recommended tool for these platforms
- Modern ribbon-menu interface
- Simulation and debugging functions for documented target/project combinations
- System design and multi-CPU engineering functions for supported configurations
- Ladder, structured-text and function-block workflows where the selected CPU supports them
- Release-specific features that must be verified in the current operating manual
FX5U: Use GX Works3. If you are migrating an older FX project, follow the conversion table in the current GX Works3 operating manual and retest every replaced device, parameter and instruction.
Migration Considerations: GX Works3 can open selected GX Works2-format projects, but conversion support and the target CPU vary. A successful file conversion is not a commissioned migration: review conversion messages and retest I/O mapping, timing, communications, motion and safety behavior on the target hardware.
Which Should You Use?
- GX Works2: Existing Q series, L series, FX3 and older FX installations
- GX Works3: documented new projects on iQ-R, iQ-F, or FX5U hardware
Which Mitsubishi PLC is best for beginners?
An FX5U project is a practical starting point when your objective is current GX Works3 compact-controller programming. It is not automatically the cheapest or best purchase in every region. Start with the simulator workflow in this guide, then choose hardware from a distributor quote and the exact CPU manual.
Beginner selection criteria:
- the selected CPU appears in your installed GX Works3 supported-model table;
- the simulator supports the project type you plan to practice;
- the training unit exposes safely protected low-voltage I/O;
- the distributor can supply the correct license and connection method; and
- the manual set covers the CPU, I/O wiring and any option modules.
Learning Resources:
- Mitsubishi FA Academy training courses
- GX Works3 help and sample projects supplied with your edition
- Online video tutorials on YouTube
- Mitsubishi technical support and forums
- Third-party training providers
Starter-kit purchasing checklist:
- exact FX5 CPU catalog number and power-supply type;
- GX Works3 license/edition and supported operating system;
- the CPU's documented USB or Ethernet connection method;
- protected switches and indicator loads appropriate to the training voltage; and
- enclosure, fuse/protection and emergency isolation for the physical trainer.
Do not buy an SC-09 legacy FX cable or GX Works2 license for an FX5U merely because a generic starter list recommends it.
What programming languages do Mitsubishi PLCs support?
Language support is a CPU-and-software compatibility question, not a brand-wide promise. Mitsubishi projects can expose ladder, structured-text, function-block and sequential editors in supported combinations, while legacy instruction-list or mnemonic representations may appear in older environments.
For the exact controller:
- choose the CPU in GX Works2/GX Works3;
- inspect the available program-unit and language choices;
- confirm restrictions in the programming manual;
- compile a minimal program in each required language; and
- verify cross-language calls, data types and online-change behavior.
Do not rely on a generic yes/no matrix, particularly for older FX/Q CPUs or converted projects.
What is the difference between FX and iQ-R series?
FX/iQ-F is a compact-controller architecture; iQ-R is a modular platform with a broader CPU/module system. That distinction is useful, but family-wide speed, I/O and price ratios are not.
Compare exact configurations:
| Decision | Evidence to collect |
|---|---|
| Local and remote I/O | CPU/module manuals, refresh map and panel I/O list |
| Program capacity and scan | compiled project resource report plus measured worst-case scan |
| Motion | required axes/functions matched to the exact motion CPU/module and drive |
| Networks | built-in ports and required option modules, with calculated cyclic load |
| Safety | supported safety architecture and its separately approved manual |
| Lifecycle | regional lifecycle notice, spare strategy and distributor lead time |
| Cost | dated bill of materials, software/license quote, engineering and spares |
Choose the smallest supported configuration that meets the documented requirements with acceptable expansion and lifecycle margin.
Is GX Works software free?
GX Works3 and GX Works2 are licensed products. Trial, educational, upgrade and production entitlements vary by edition, date and region; confirm them with Mitsubishi's regional portal or an authorized distributor.
GX Works3: Paid/licensed, varies by edition. Purchased through Mitsubishi authorized distributors. Covers iQ-R, iQ-F, and FX5/FX5U series.
GX Works2: Paid/licensed, varies by edition. Covers supported Q, L, FX3 and earlier families and remains widely deployed across existing installations.
Ask the distributor to state the license type, permitted users/machines, included MELSOFT components, update entitlement and offline/online activation requirements in the quote.
Legacy-tool availability: Some regional Mitsubishi sites and legacy media have distributed GX Developer-FX for selected older FX controllers. Availability and supported models vary by region and date. Use Mitsubishi's regional download portal and the exact controller manual; do not download engineering software from an unofficial mirror or assume a legacy package supports FX5U, Q or iQ-R hardware.
For a complete comparison of free and paid PLC programming software across all major brands, see our free PLC programming software guide.
How do I connect to a Mitsubishi PLC?
Connecting requires the method documented for the exact CPU or communication adapter. For legacy cable context, see the Mitsubishi USB SC-09 cable setup guide, but do not assume an SC-09-style cable fits an FX5, Q or iQ-R controller.
Connection workflow:
- Photograph the CPU label and record its complete catalog number.
- Open that CPU's hardware/user manual and identify its supported engineering connection.
- Select GX Works2 or GX Works3 from the supported-software table.
- Use only the documented Mitsubishi cable/adapter or Ethernet interface and required driver.
- Back up the existing project and parameters before writing.
- Configure the connection destination, run the communication test and read the PLC type.
- Confirm the detected CPU matches the offline project before upload, download or remote mode change.
For Ethernet, use an approved engineering address and follow the site's access-control/change procedure. Do not copy example production IP addresses from a tutorial. For serial links, copy baud rate, framing, station and adapter settings from the hardware documentation and existing project.
What is CC-Link protocol?
CC-Link is an industrial-network family promoted by the CC-Link Partner Association and used by Mitsubishi controllers and certified partner devices. The family includes technologies with different physical layers and engineering rules; “CC-Link compatible” alone is not enough to design a network.
CC-Link Protocol Family:
Classic CC-Link (fieldbus):
- serial field network with speed/distance/topology rules;
- station and occupied-station allocation; and
- dedicated cable and termination requirements.
CC-Link IE Field Basic:
- Ethernet-based cyclic communication on supported devices;
- CPU/device-specific connection and cyclic-data limits; and
- topology/cable requirements from the applicable manuals.
CC-Link IE Field:
- dedicated industrial-Ethernet network products;
- calculated cyclic performance based on the actual configuration; and
- master/local, remote-device and topology compatibility to verify.
CC-Link IE TSN:
- TSN-based products and profiles;
- time synchronization and traffic scheduling; and
- managed-network design that must be verified end to end.
Use the CC-Link Partner Association's certified-product information plus the manuals for every selected device. Record network type, product revision, station allocation, cyclic map, cable/topology, measured update time and loss/recovery behavior.
Learn More: For comprehensive CC-Link implementation guidance, see our complete CC-Link protocol tutorial covering network configuration, wiring, programming, and troubleshooting.
Can Mitsubishi PLCs communicate with other brands?
Yes—when the exact CPU/module and the peer device share a documented protocol and compatible role. Mitsubishi offers different protocol options across product families; none should be described as universally built in.
For EtherNet/IP, Modbus TCP/RTU, PROFINET, OPC UA or another protocol, verify:
- CPU/module catalog number, firmware and supported role;
- peer product and certified device/profile file where applicable;
- connection count, cyclic/explicit data limits and update target;
- data type, byte/word order, scaling and quality/status representation;
- timeout, stale-data and reconnect behavior;
- network segmentation, credentials/certificates and change control; and
- an integration test using the exact devices and revisions.
Use the instruction examples supplied for that Mitsubishi module/CPU. Generic MODRD or EIPRD snippets found online can look credible while failing to compile or using the wrong address model.
Integration Considerations:
- Data type conversion may be required
- Communication cycle times vary by protocol
- Configuration complexity depends on protocol
- Test thoroughly with actual devices
- Consult device manufacturer documentation
Recommended Approach: For a gateway, apply the same evidence standard: supported revisions at both ends, mapping ownership, diagnostic visibility, failure behavior and spare configuration.
What industries use Mitsubishi PLCs?
Mitsubishi publishes application material for machine building, material handling, automotive, electronics, packaging and process-related automation. That demonstrates possible use cases, not a measured share of installations by industry or region.
When evaluating fit for an industry, check the requirements that matter to the actual machine:
- local service, distributor stock and the customer's approved-vendor list;
- environmental and electrical approvals for the installation country;
- required motion, robot, vision and remote-I/O interfaces;
- safety architecture and applicable machinery/process standards;
- cybersecurity, user management and network-segmentation requirements;
- product lifecycle, spare strategy and migration path; and
- engineering skills already available at the plant or integrator.
Named-customer adoption, market-share percentages and regional installation splits should only be published with a current, attributable source. This guide does not use them to recommend a platform.
How do I get started with Mitsubishi PLC programming?
Use an evidence-based sequence rather than a fixed cost or learning-time promise:
Step 1: Build the simulated FX5U project
- Install a licensed/current GX Works3 release supported in your region.
- Select the exact simulated FX5 CPU in the project.
- Build the start/stop example in this guide.
- Execute every row in the downloadable CSV test matrix.
- Save a compile result, screenshots of monitored states and a defect log.
Step 2: Add one concept per revision
- replace raw devices with labels and comments;
- add a documented timer and its boundary tests;
- add a rising-edge production counter and reset test;
- add a fault state and deliberate recovery sequence; and
- export a revision record after each passing change.
Free Learning Resources:
- Mitsubishi FA Academy online courses
- YouTube tutorials for Mitsubishi PLC programming
- Mitsubishi technical manuals (download from FA website)
- Online forums and user communities
Step 3: Progress through bounded practice projects
Beginner Projects:
- Traffic Light Controller: Timers and sequential control
- Conveyor Command: start/stop with ordinary process permissives
- Tank Level Control: Analog input processing and pump control
- Sorting System: Sensors, counters, and conditional logic
Intermediate Projects: 5. Temperature Control: scaling, alarm and documented controller/function-block behavior 6. Multi-Station Production Line: Coordinated sequence control 7. HMI Integration: GOT touchscreen programming 8. Network Communication: CC-Link or Modbus implementation
Step 4: Add hardware only when the test requires it
Obtain a dated distributor quote for the exact CPU, GX Works3 license, power supply, safe training enclosure and documented connection method. Validate wiring, input filters, output load behavior, scan time, power-cycle retention and communication-loss states on the bench. Keep motion and safety work under qualified supervision.
Step 5: Use current training sources
Check Mitsubishi FA e-learning/Academy availability in your region, current course outlines and prerequisites. Course names, duration, price and certificates change, so this guide does not publish a universal schedule.
Third-Party Training Options:
- Local technical colleges and trade schools
- Online platforms (Udemy, Coursera, LinkedIn Learning)
- Industrial automation training companies
- In-house corporate training programs
Practical experience paths:
- Entry-level controls technician positions
- OEM machine builder programming roles
- System integrator project engineering
- Plant maintenance and support positions
- supervised commissioning and migration work after documented training
Success Tips:
- practice regularly and keep evidence of each passed test
- Join online communities for support and advice
- Study existing programs to learn patterns
- Document your learning and projects
- experiment in the simulator or an isolated trainer, not a live machine
- focus on why each state occurs, not just copying code
Why does an FX input address jump from X7 to X10?
FX-family X and Y device notation is octal for the documented controllers, so the written digits 8 and 9 are not used. X10 is the device after X7; it does not mean decimal input ten. Reconcile the configured module layout, hardware terminal drawing and online device monitor before changing logic. Do not apply this rule to iQ-R, whose X/Y notation is documented as hexadecimal.
Can I open an FX3U GX Works2 project and download it directly to an FX5U?
No. Treat this as a controlled conversion and migration. Preserve the original project, choose the documented target conversion in the current GX Works3 manual, save every conversion message, review device ranges and replaced instructions, rebuild, then retest timing, I/O, communications, retention and restart behavior. A project that converts or compiles is not proof that the new controller behaves like the old one.
What should I save before troubleshooting a Mitsubishi PLC?
Save the complete project and parameters through the site's authorized procedure, then record the CPU/module catalog numbers, firmware, engineering-software version, online identity, controller mode, diagnostic history, timestamps and a hash or controlled revision of the archive. Capture the symptom before clearing diagnostics. Do not write, change mode or force a device until the machine state, safety authority and rollback are understood.
Can a browser simulator replace GX Works3 or an FX5U test bench?
No. A browser simulator can teach scan order, Boolean logic, timers, counters and evidence-driven fault isolation. It cannot compile a GX Works3 project or reproduce a selected CPU's firmware, device allocation, retained memory, module behavior, electrical I/O, network timing, restart effects or safety architecture. Use it to prepare cases, GX Works3 for documented project simulation, and controlled hardware for the remaining acceptance tests.
Primary sources and verification ledger
This page uses manufacturer and standards-owner material rather than copied forum values. Document numbers and release revisions can change; retrieve the current revision for the exact catalog number and keep it with the project. The ledger was reviewed on 31 August 2026.
| # | Primary source | What it governs in this guide |
|---|---|---|
| 1 | Mitsubishi Electric GX Works3 manual index | current operating and installation documents |
| 2 | GX Works3 Operating Manual, SH-081215ENG Ver. AT | project creation, conversion, simulation and online workflow |
| 3 | GX Works3 official product overview | intended iQ-R/iQ-F engineering scope |
| 4 | GX Works3 official procedure library | vendor-demonstrated editor procedures |
| 5 | MELSEC iQ-F manual index | current CPU, programming and communications manuals |
| 6 | FX5U User's Manual (Hardware), JY997D55301 | FX5U installation, terminals and hardware limitations |
| 7 | FX5S/FX5UJ/FX5U/FX5UC User's Manual (Hardware), SH-082452ENG | current consolidated iQ-F hardware reference |
| 8 | MELSEC iQ-F product page | current family structure and official downloads |
| 9 | FX5U CPU official product page | qualified FX5U platform description |
| 10 | FX5 simulator support note | manufacturer-stated simulator scope starting point |
| 11 | FX5 User's Manual (MODBUS Communication), JY997D56101 | supported serial MODBUS functions and frames |
| 12 | GX Works2 official manual index | Q/L/earlier-FX engineering workflow by supported model |
| 13 | MELSEC iQ-R official product page | modular iQ-R platform and exact-series documentation |
| 14 | MELSEC programmable-controller product index | official separation of iQ-R, iQ-F, Q, L and F product lines |
| 15 | CC-Link Partner Association network specifications | distinction between CC-Link network families |
| 16 | CLPA certified-product search | device/profile conformance evidence |
| 17 | ODVA EtherNet/IP technology overview | protocol roles and CIP/EtherNet/IP boundary |
| 18 | Modbus Organization specifications | vendor-neutral MODBUS protocol baseline |
Ready to Master Mitsubishi PLC Programming?
Mitsubishi's FX, Q/L and iQ-R families span different hardware generations and engineering workflows. The durable skill is not memorizing family-wide limits: it is selecting the exact CPU/software pair, tracing every technical claim to its manual, and producing reproducible compile, simulation and hardware-test evidence.
Key Takeaways:
- Platform Selection: compare exact catalog numbers, lifecycle and option modules
- Software Proficiency: use GX Works3 for FX5/iQ-F and iQ-R; use GX Works2 only for documented older families
- Programming Languages: Ladder logic foundation plus structured text for complex applications
- Networking: Understand CC-Link protocol family for distributed control
- Best Practices: Follow structured programming, comprehensive documentation, thorough testing
Next Steps:
- Confirm GX Works3 access and FX5 simulator support in your region.
- Build the first program and execute the seven-state CSV test matrix.
- Save the compile result, monitored-state evidence and unresolved hardware tests.
- Obtain a quote and exact manuals before buying a training CPU or cable.
- Explore current Mitsubishi FA training and manual revisions.
Continue Your Learning:
For deeper expertise in related automation technologies, explore these comprehensive guides:
- Siemens vs Allen-Bradley PLC Comparison - Compare Mitsubishi against global competitors
- CC-Link Protocol Tutorial - Master Mitsubishi's industrial networking
- Ladder Logic Programming Mastery - Advanced ladder logic techniques
- PLC Programming Best Practices - Professional development standards
- TIA Portal Programming Tutorial - Learn Siemens platform for comparison
Treat this page as a workflow, not a substitute for the manuals shipped with the selected CPU, modules and GX Works release. When the two conflict, the current Mitsubishi documentation and the project's approved engineering standard control.
Working with the iQ-F family specifically? The FX5U wiring and first-project guide covers complete model identification, relay/transistor output decisions, GX Works3 configuration, labels, simulation and handover.
Now run it · free to start
Practise Mitsubishi-style PLC logic in your browser
Work X/Y/M/D devices, latches, timers and counters without GX Works. An independent learning tool — free to start.
Ownership disclosure: PLC Programming IO and PLC Simulation Software are operated by the same publisher.


